Floor Plan Operation Guide
1. Create a New Floor Plan
-
Open the Floor Plan page.
-
Click “Get Start”.
-
Select a Home to create a floor plan.

2. Pre-Drawing Settings
Before drawing, you may configure the following settings:
Settings → Dimensions → Measurement Unit → Units (m/ft).
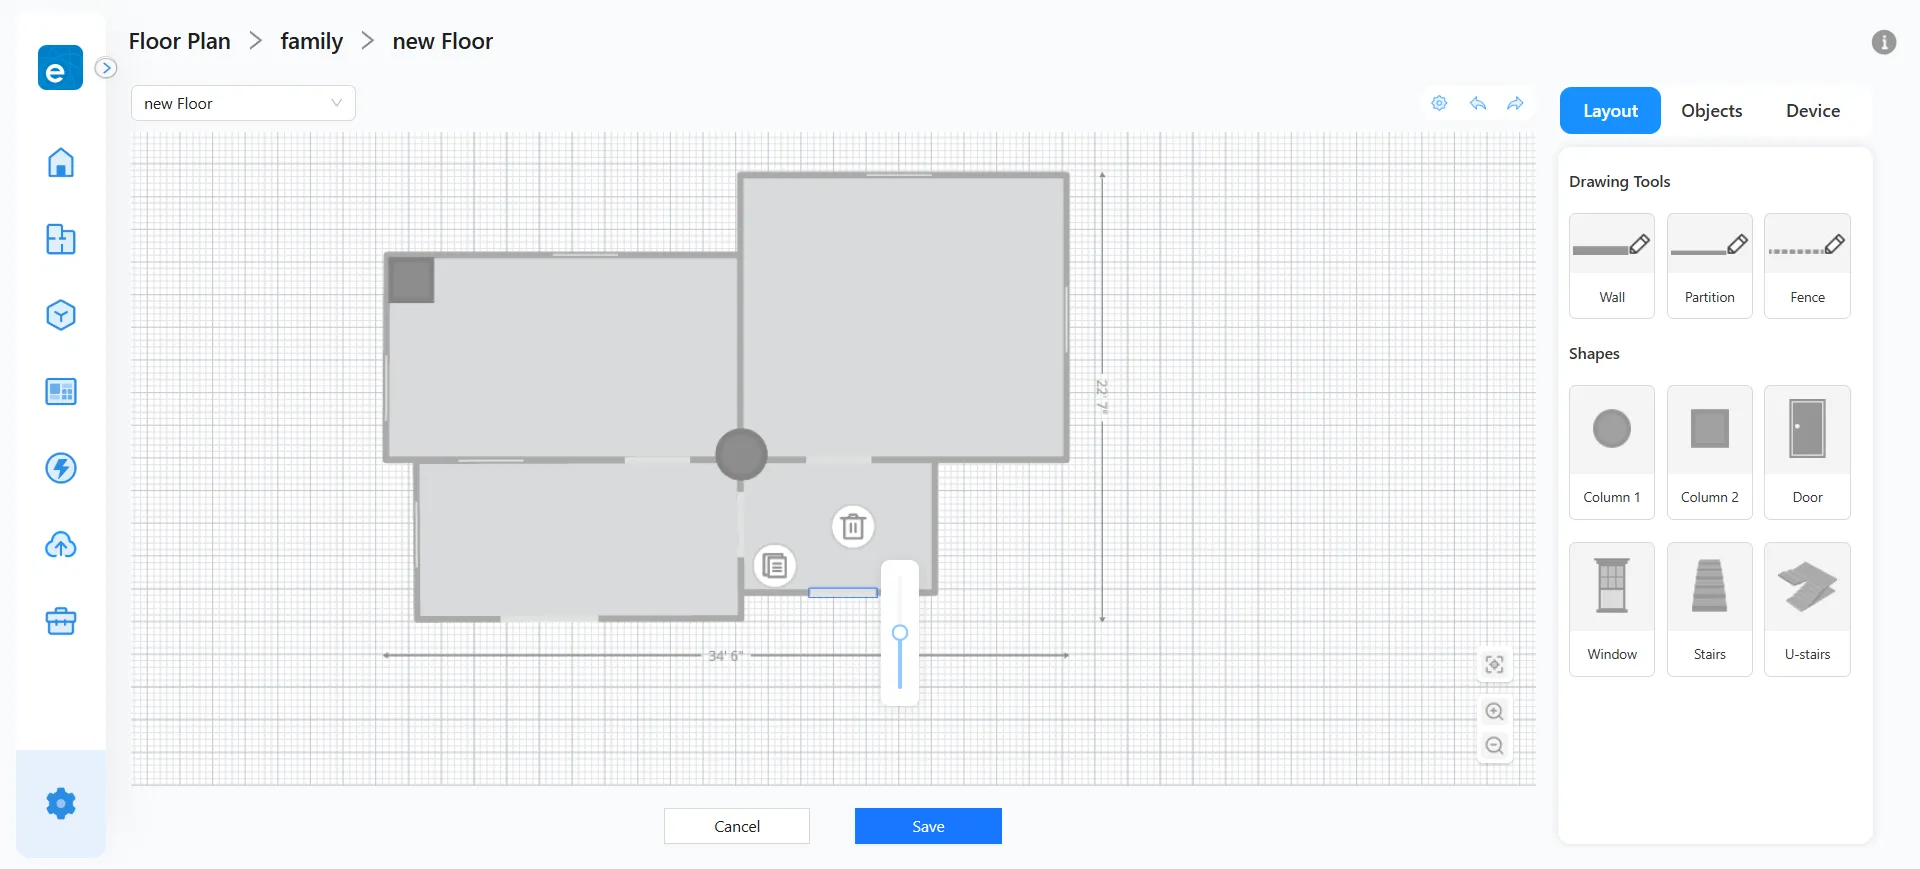
3. Drawing the Floor Plan
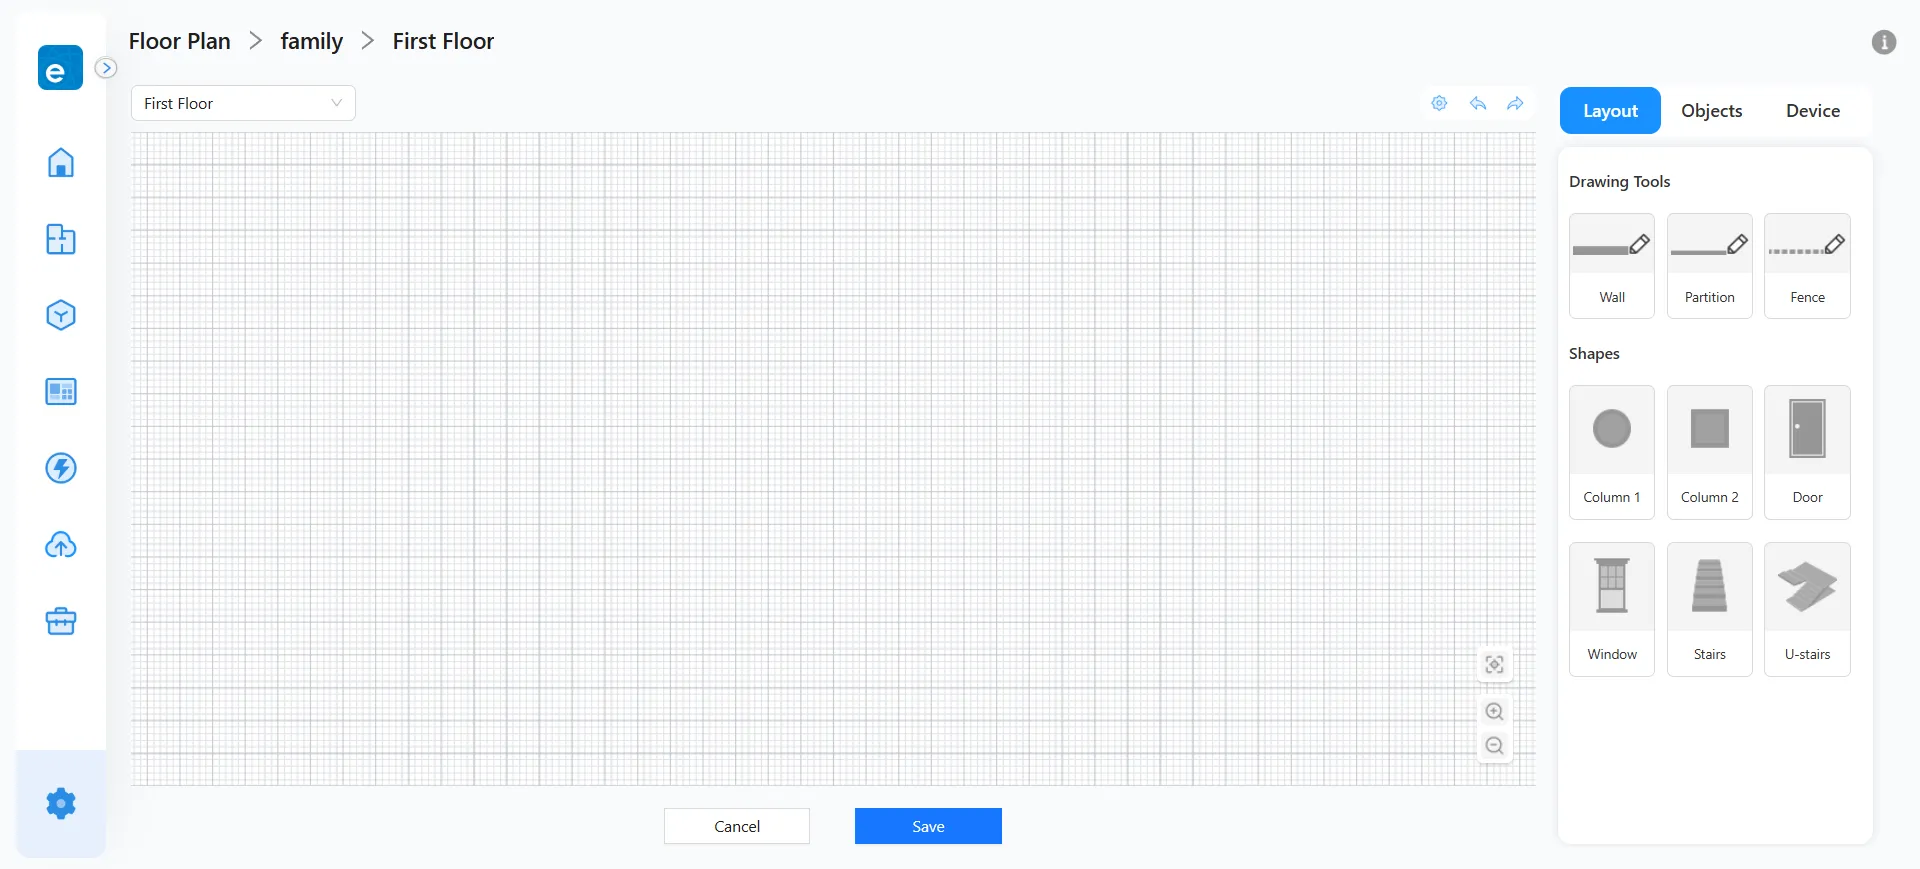
3.1 Layout Drawing Steps
-
Select Layout → Drawing Tools → Wall / Partition / Fence from the right toolbar.
-
Move the cursor into the canvas.
-
Click to set the starting point. Each additional click continues drawing the next segment.
-
Close the shape or double-click to finish drawing.
* Keyboard Shortcuts
Undo / Redo: Ctrl + Z / Ctrl + Y
Cancel Current Action: ESC
Delete: Delete
Drag edges with angle snapping: After selecting, hold Shift and move the mouse to maintain the original angle.
Drawing Methods
Method A: Outline → Rooms
1. Draw the outer boundary of the home.

2. Use partitioning tools to divide rooms inside.

Method B: Rooms → Whole Layout
1. Draw all rooms individually first.
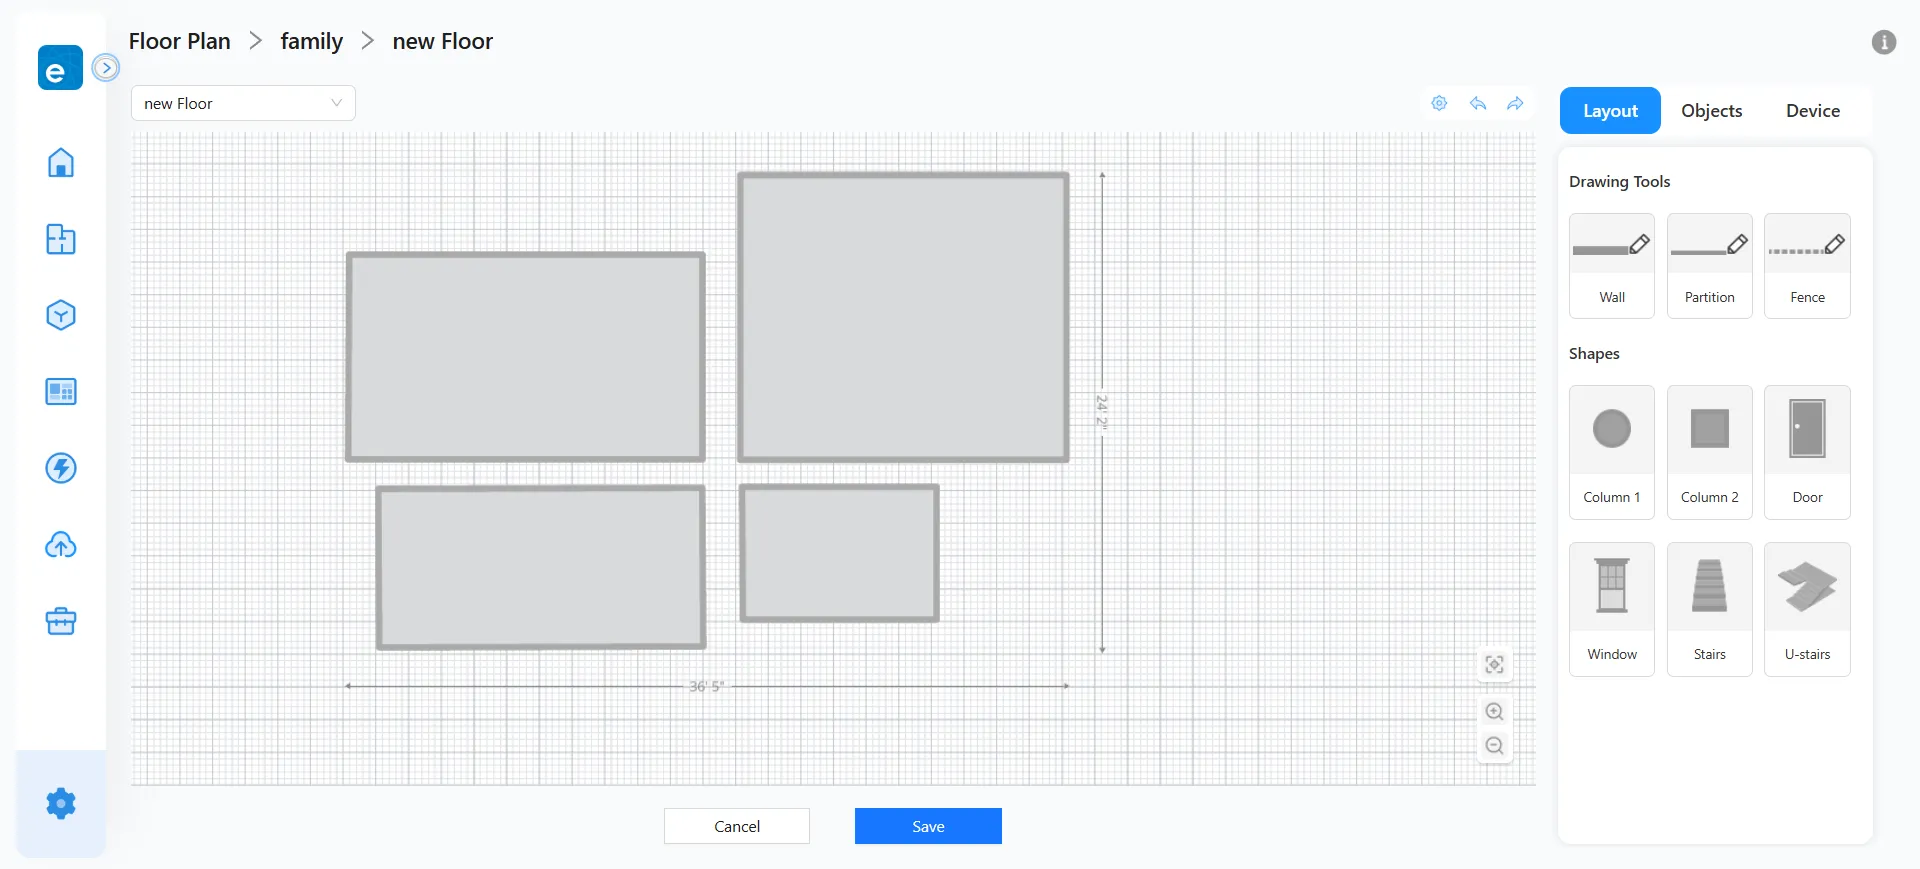
2 . Move rooms to assemble the complete structure.
3.2 After Room Division
-
Add Columns
Select Round Column or Square Column → click on the canvas to place → rotate or resize as needed.

-
Add Doors & Windows
Select Door or Window → move cursor to canvas → it will snap to the nearest wall automatically → click to place. After placement, select them again to resize or duplicate.
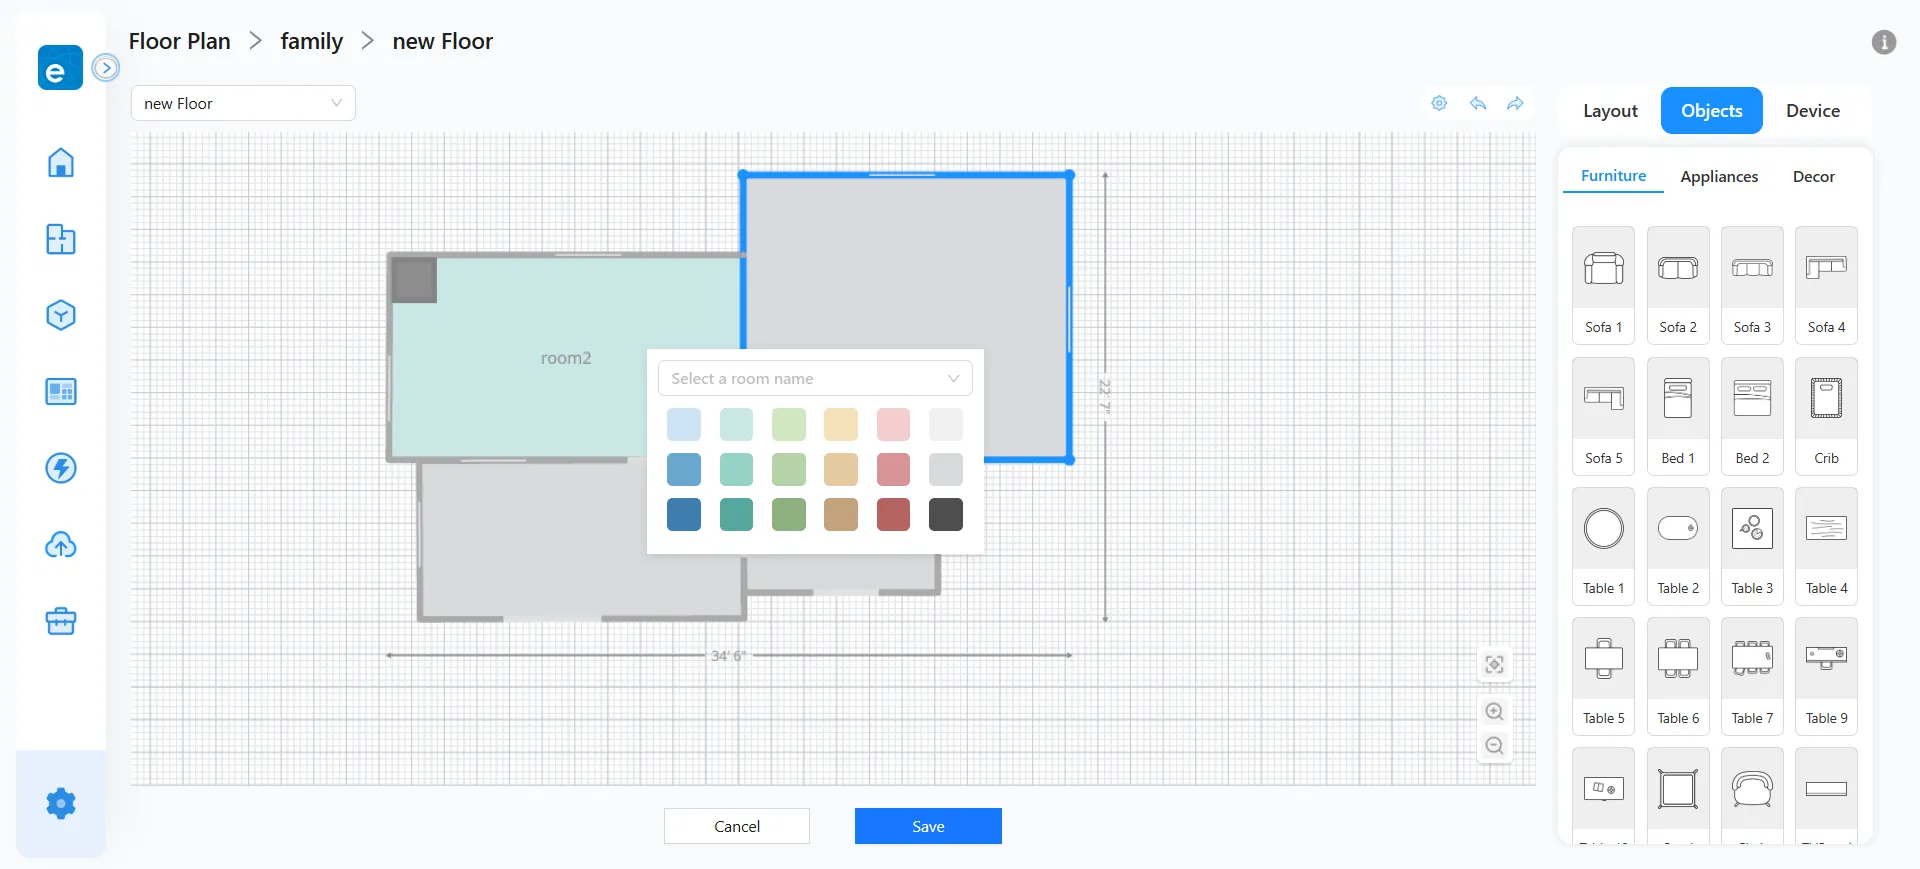
3.3 Interior Design (Objects Placement)
- Switch to the “Objects” tab from the top-right toolbar. Select any region and assign a room name and color. Room labels can be repositioned.
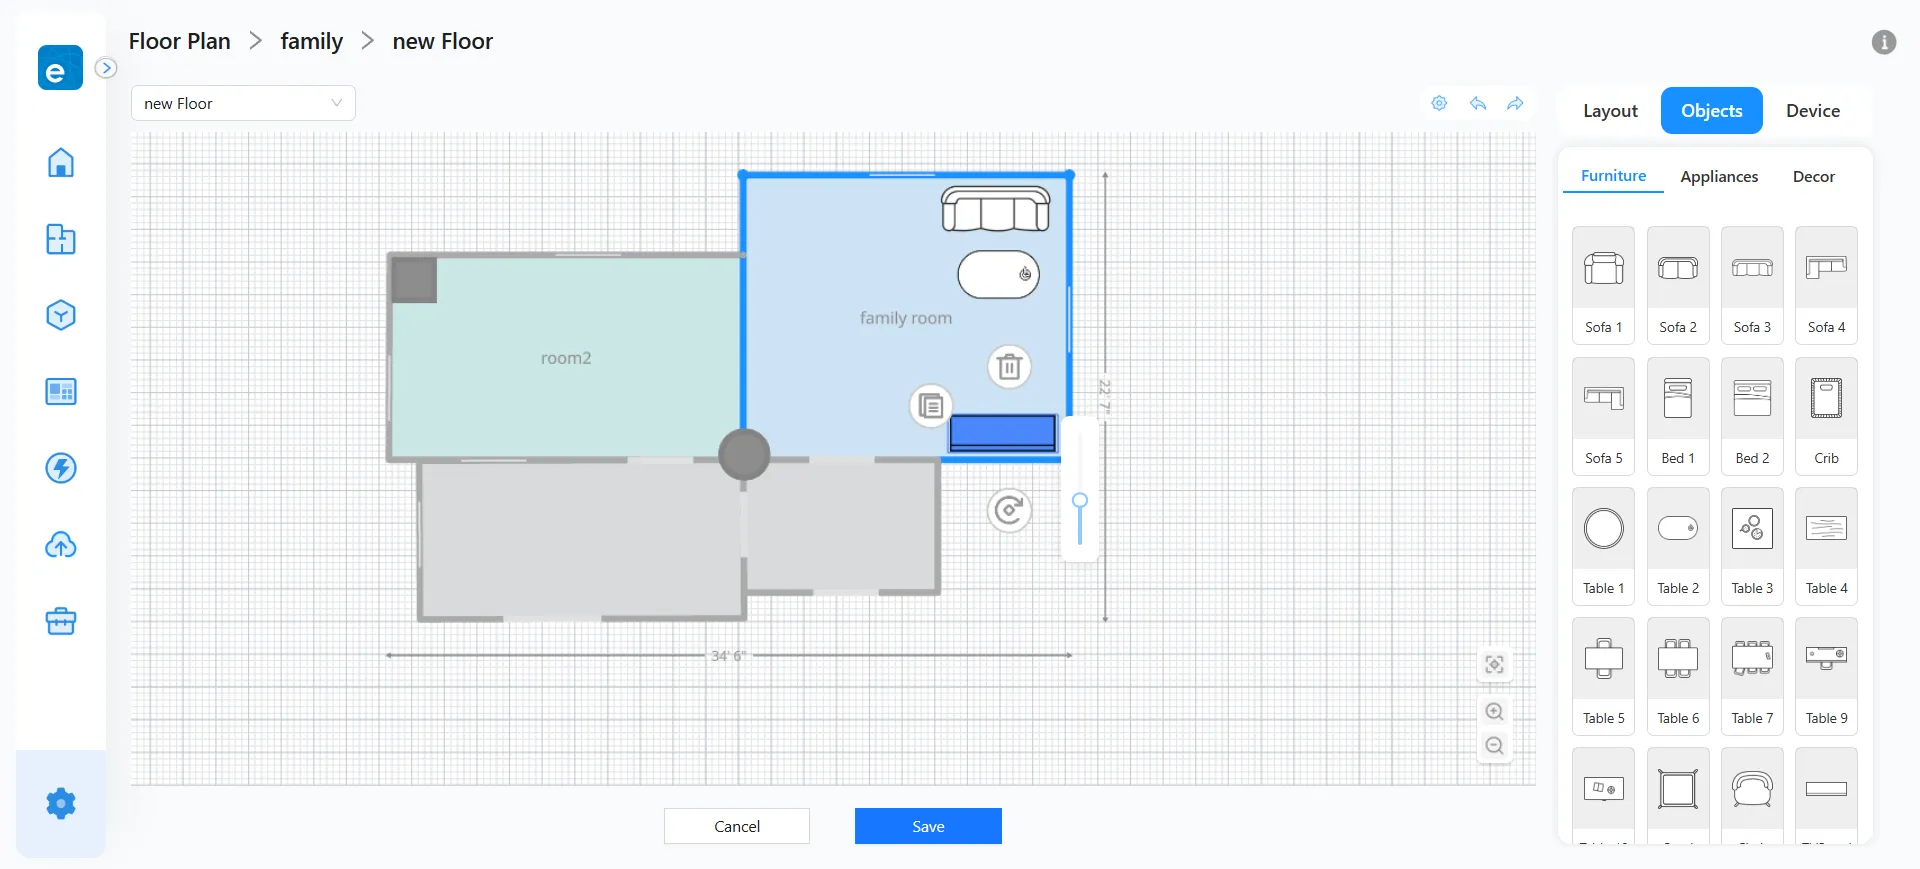
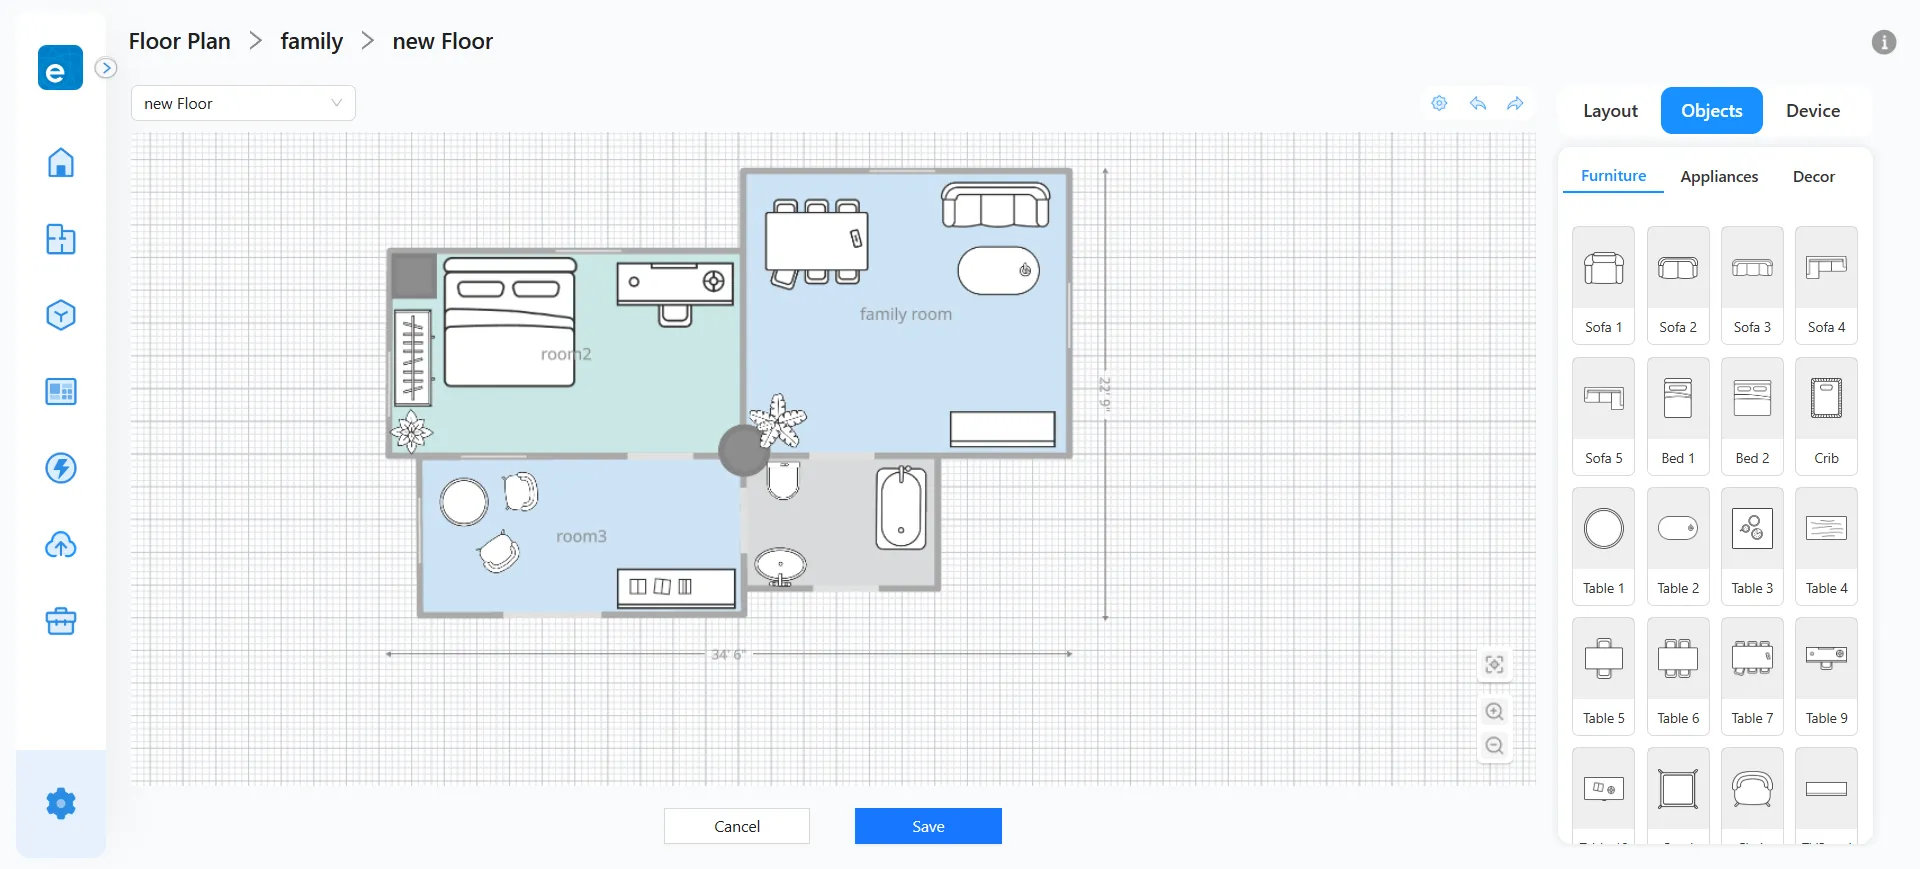
- Choose Furniture, Appliances, or Decor items → click the icon you want and place it with your cursor.
- Select placed objects to rotate or resize.
- When all items are placed, the interior view of the home is complete.
4. Floor Managment
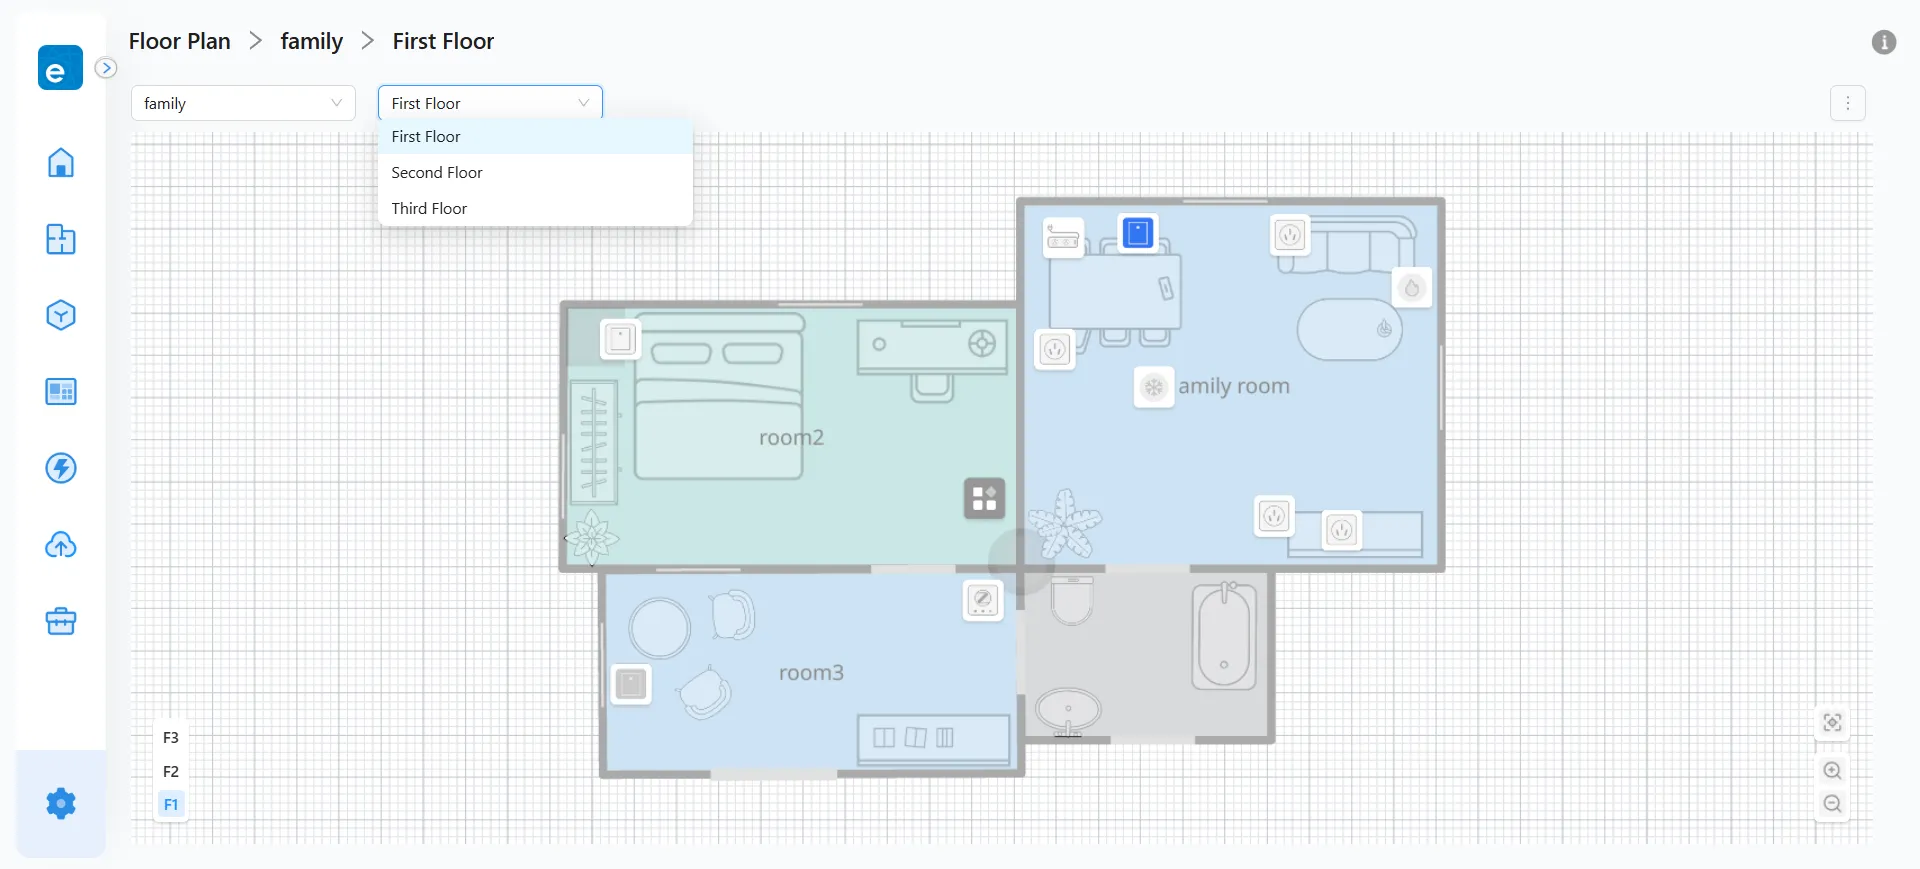
1. From the floor dropdown menu in the top-left corner, you can rename floors and add or delete floors.
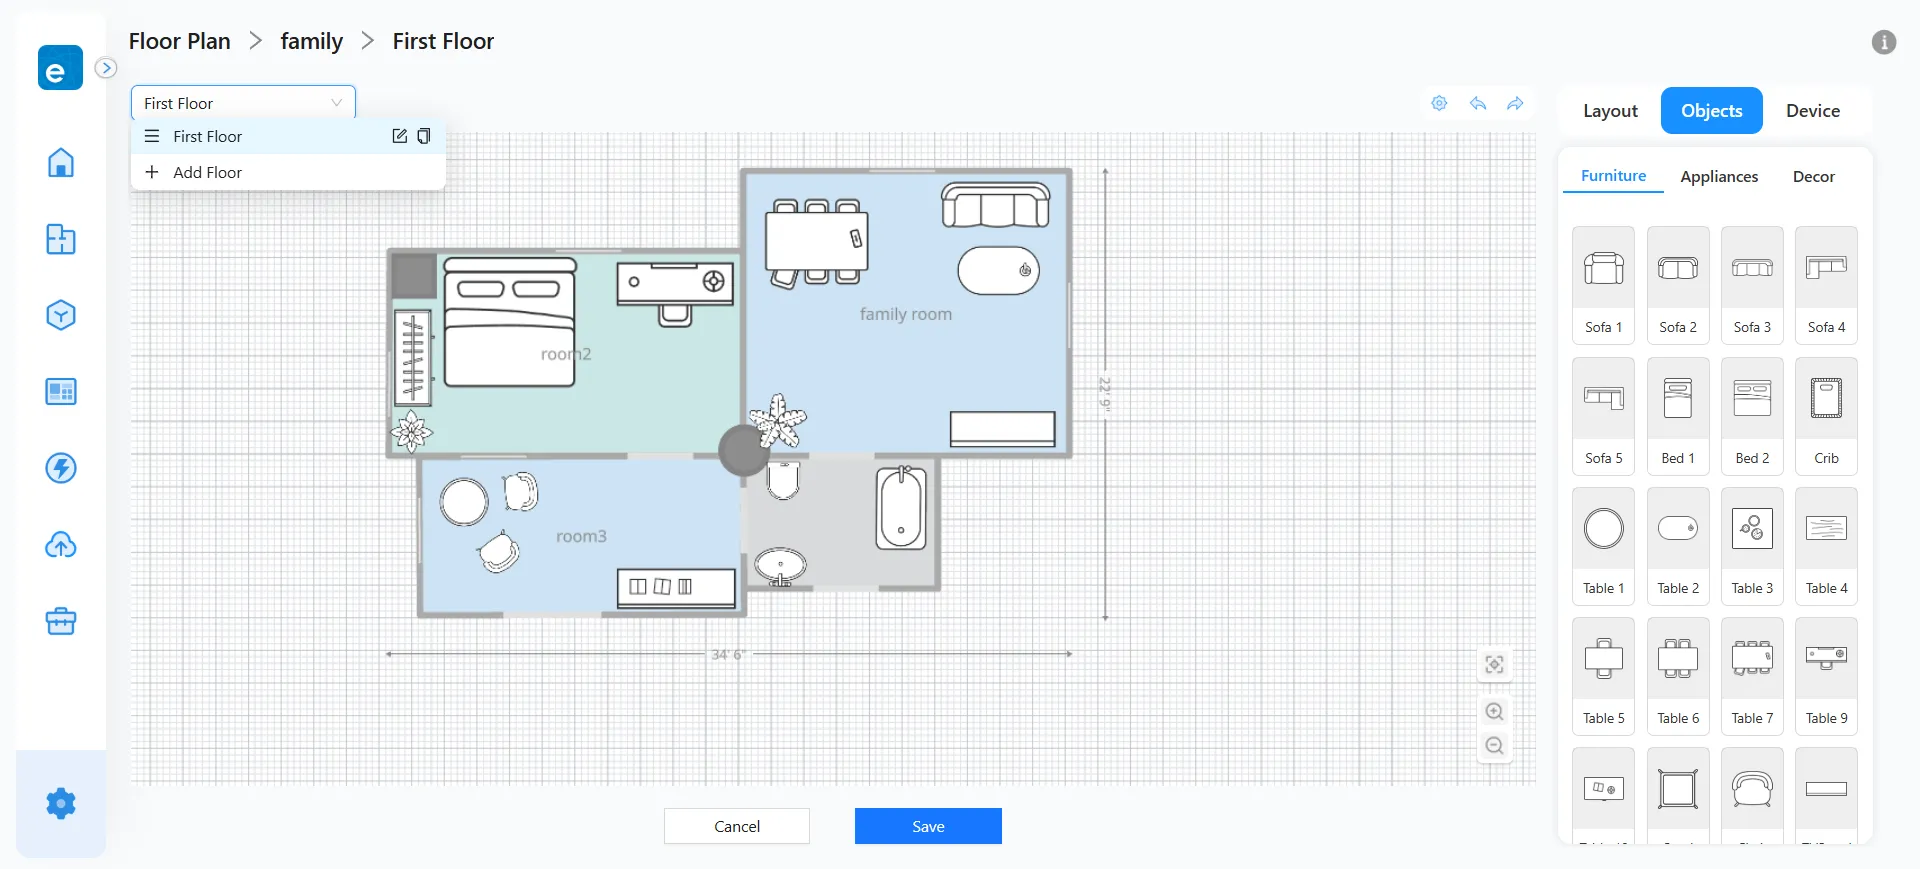
2. Each Home can have up to 3 floors. Floors can be reordered as needed.
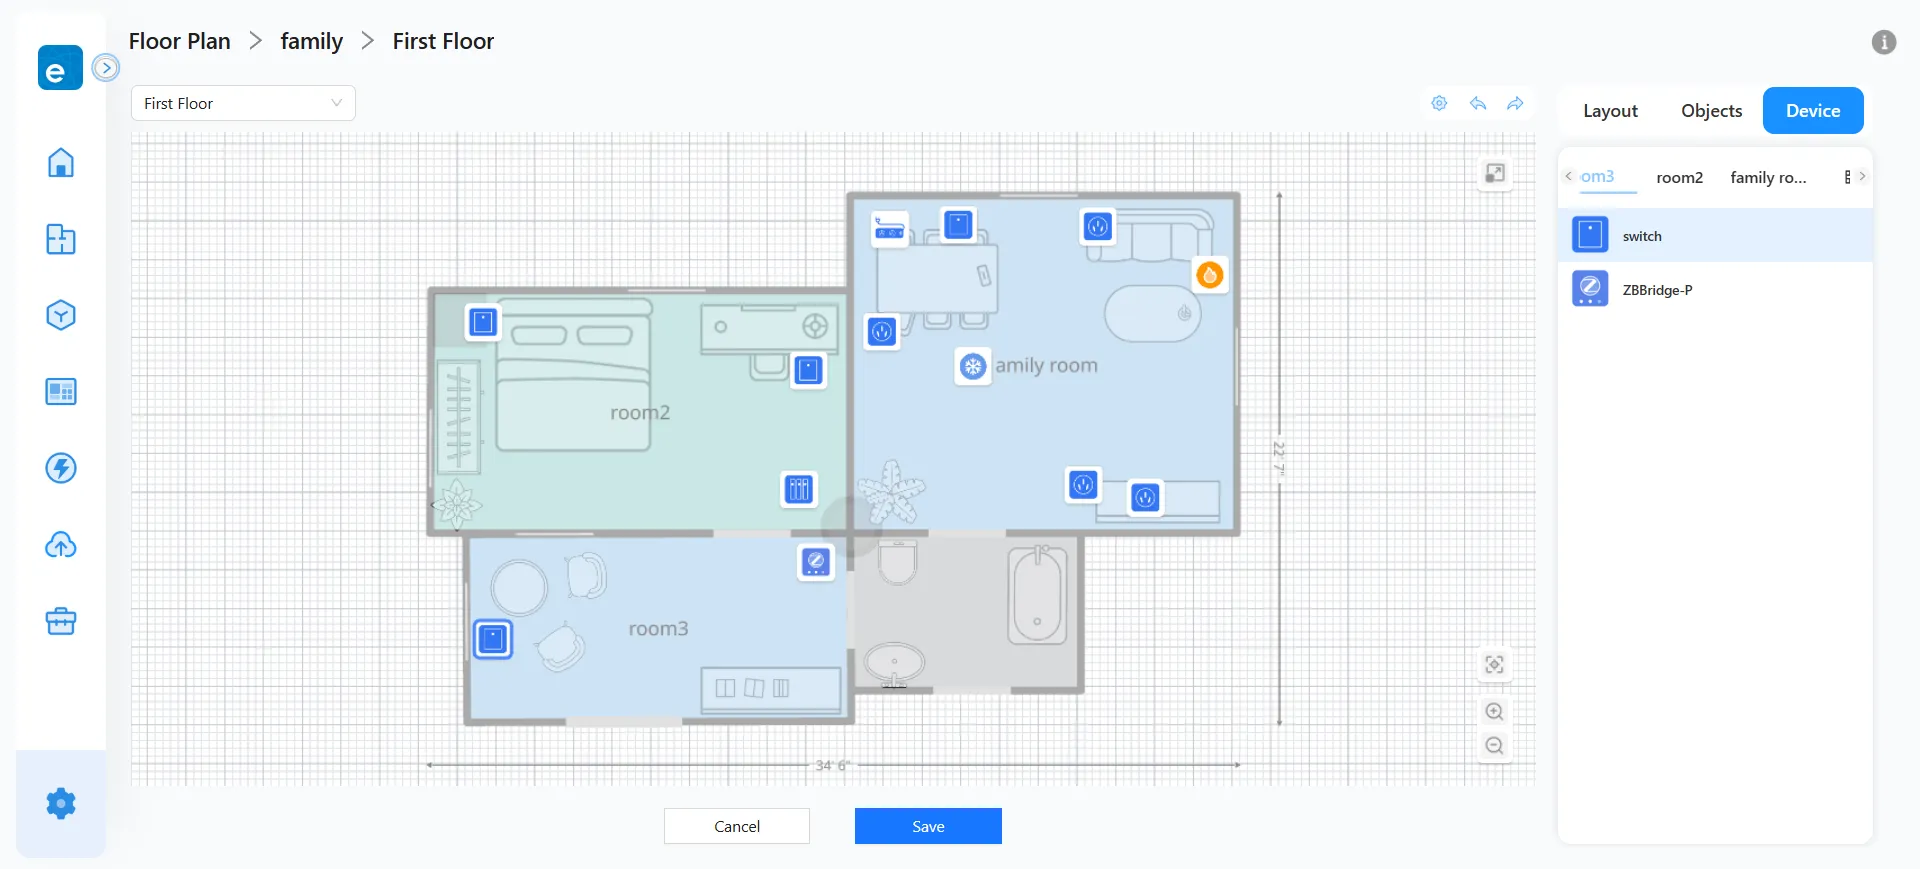
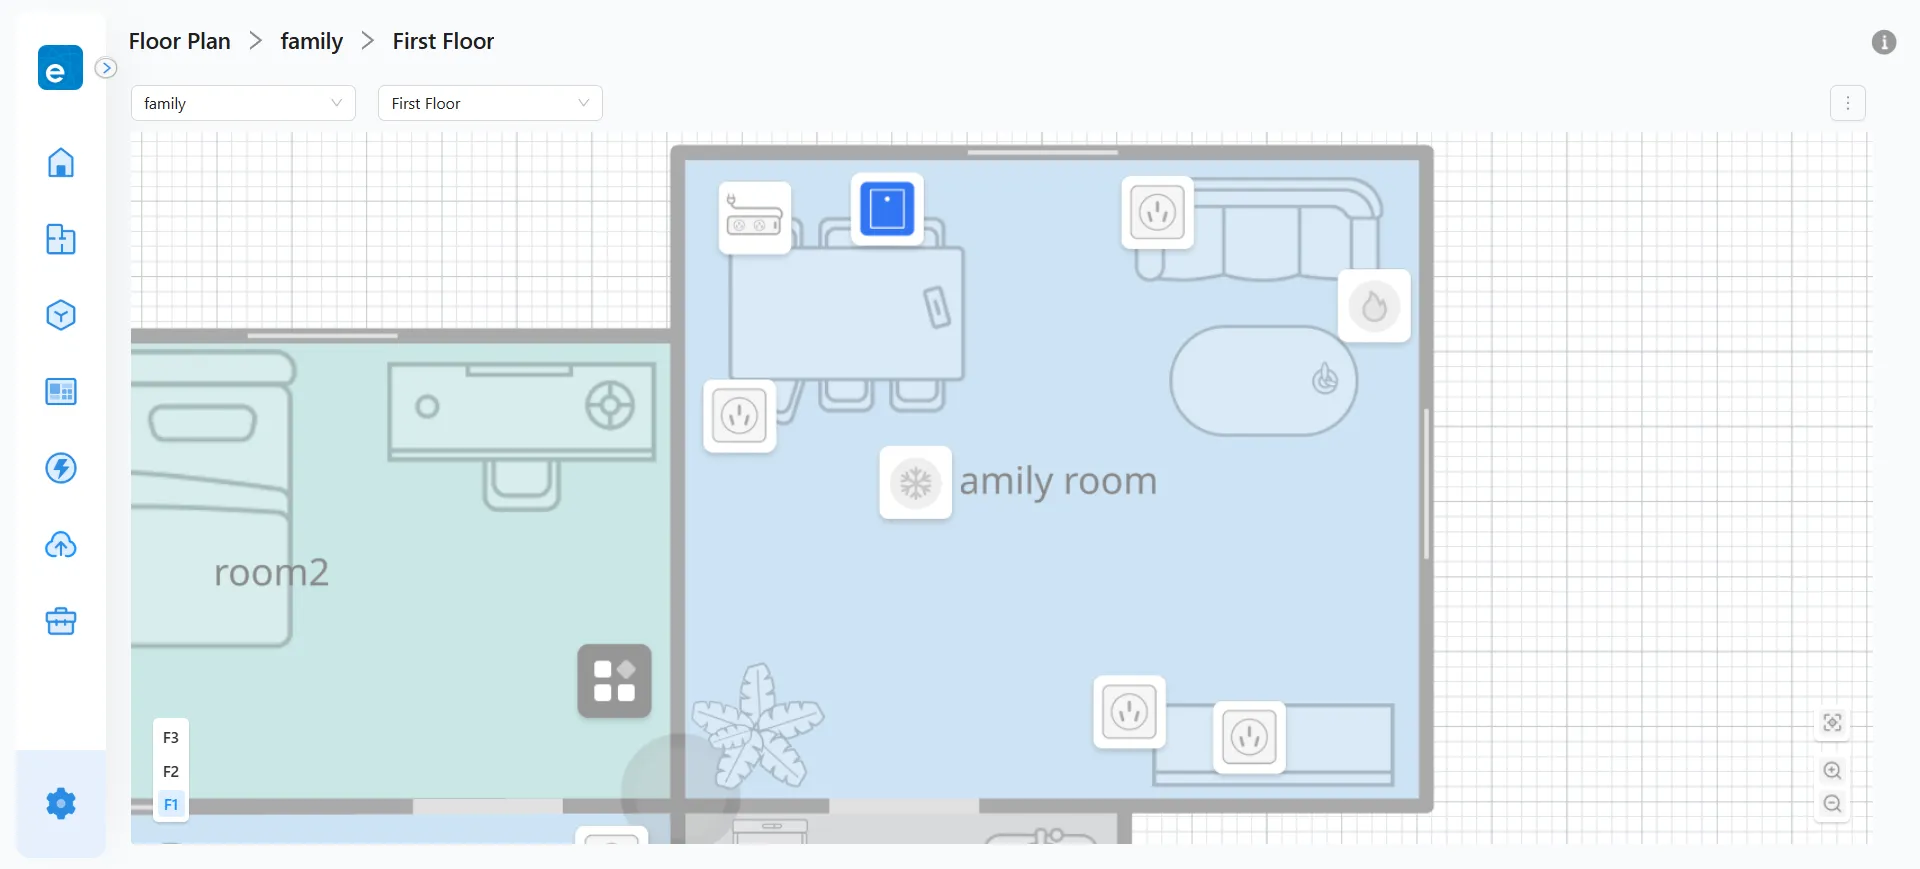
5. Device Management
1. Switch to the “Devices”. All devices belonging to each room will appear in their corresponding areas.
2. Drag a room name and place it into the corresponding area on the map.
3. Default device icons appear in random positions and basic size. You can drag to reposition or resize using the bottom-right control point.
Note: Devices in the “Unassigned” list can be placed by dragging their icons to any area on the map.
4. You can hide any device icon on the floor plan. Hidden devices will be collected in the “Hidden Icons” list, where they can be restored at any time.
Shortcut: In the “Hidden Icons” list, use Shift + Mouse Wheel to scroll.
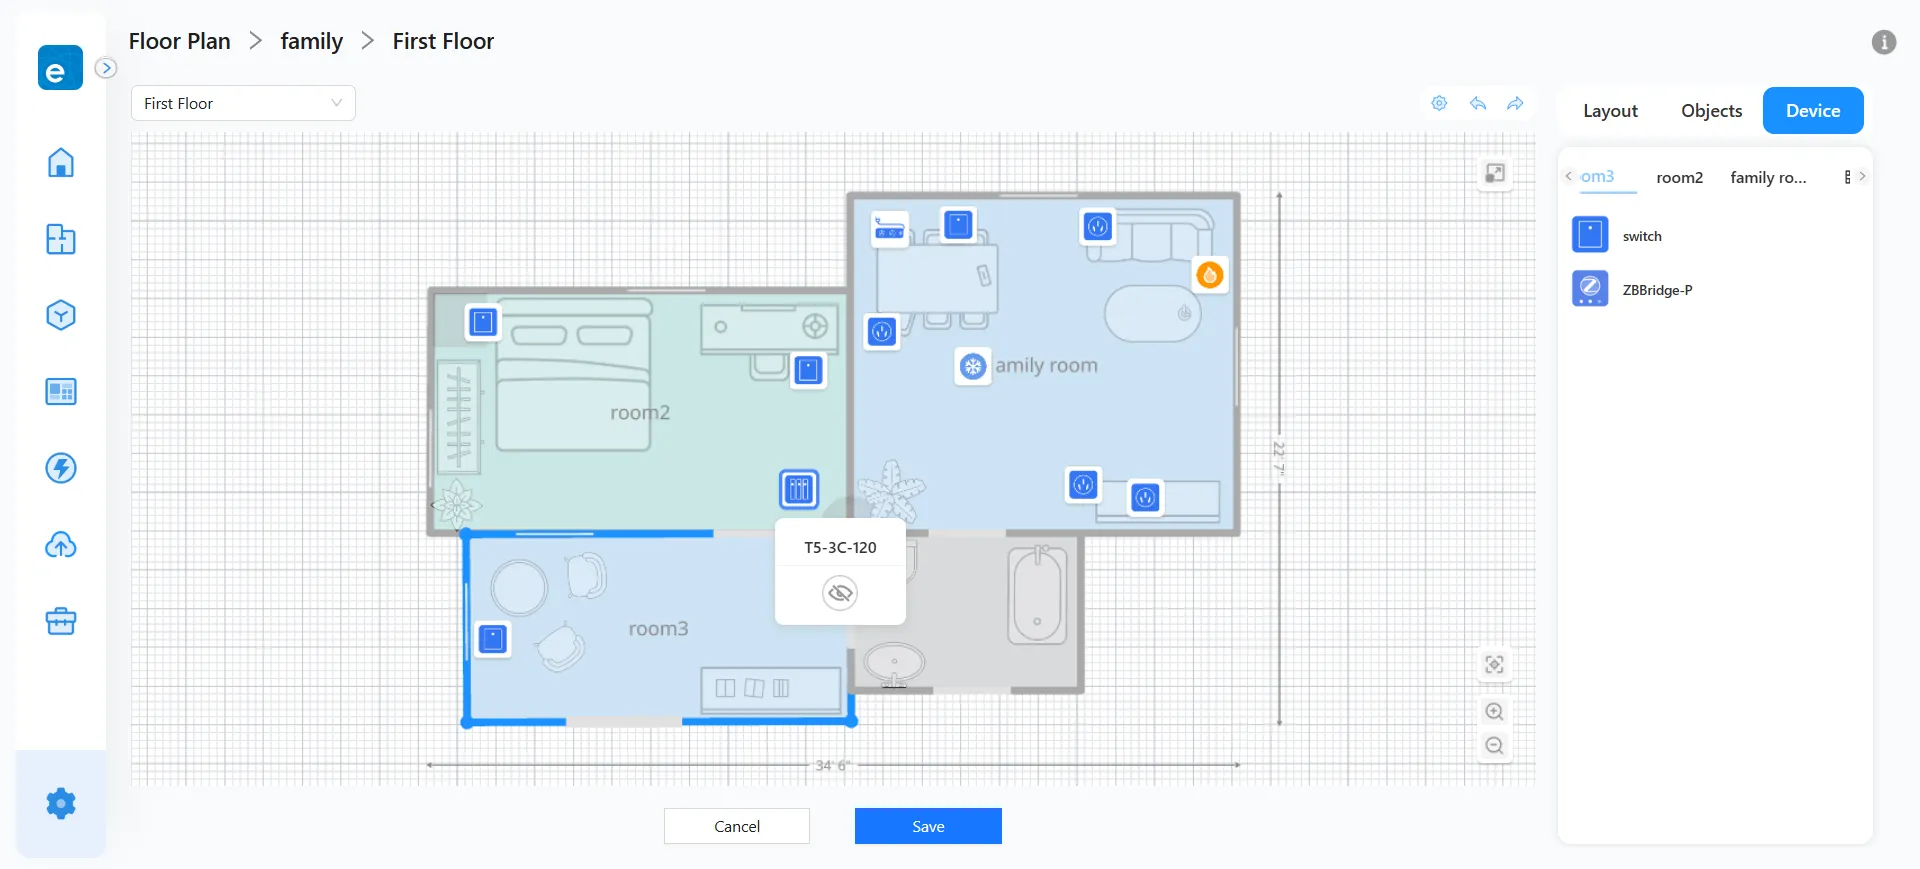
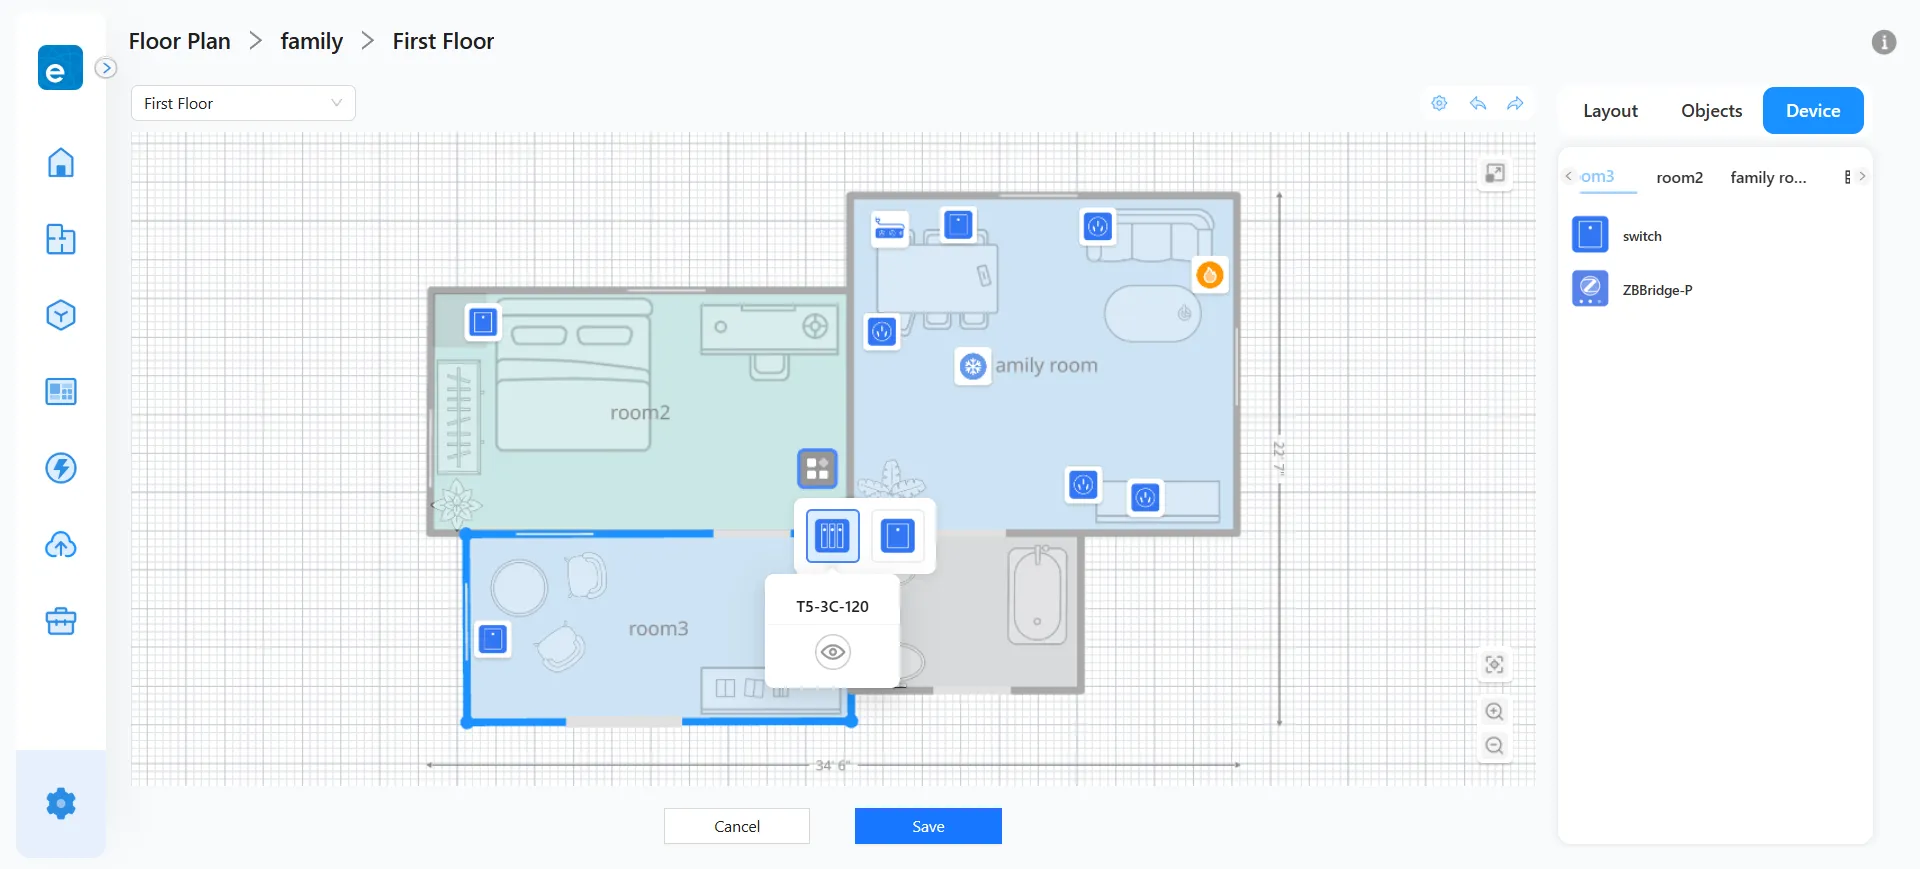
5. After adjusting device placements, click “Save” to complete the floor plan.
6. Viewing & Managing Floor Plans
1. After saving, you will enter the Floor Plan overview. You may zoom in or out to view the layout.
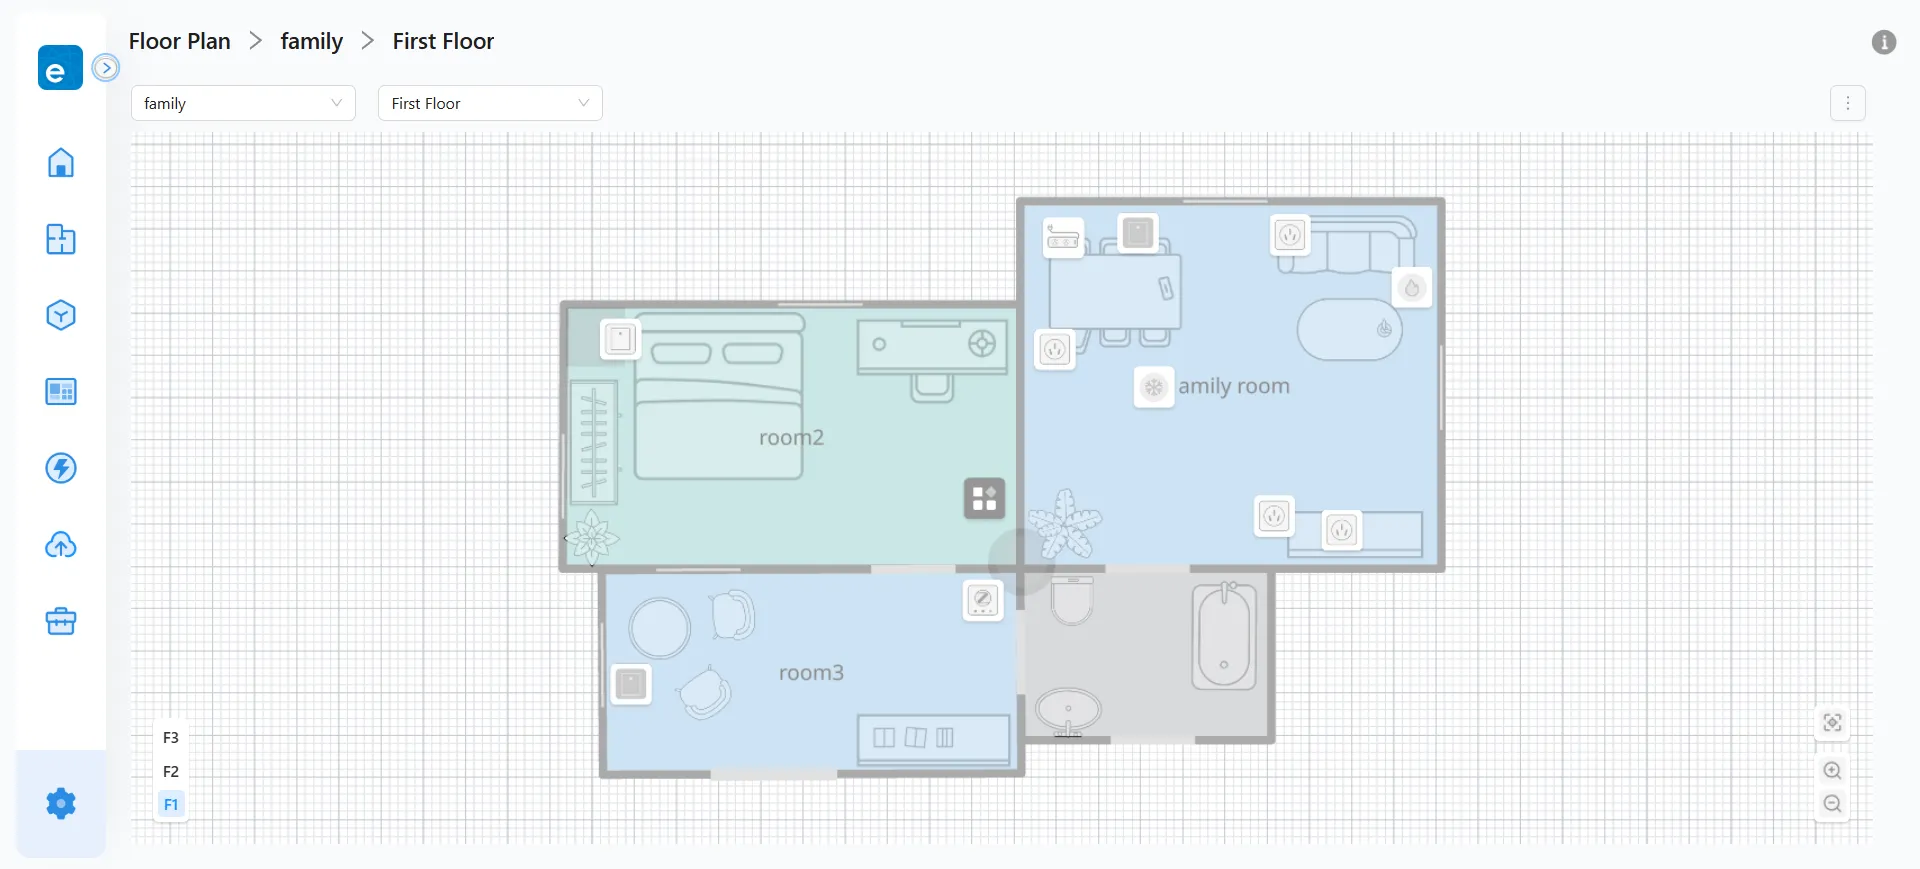
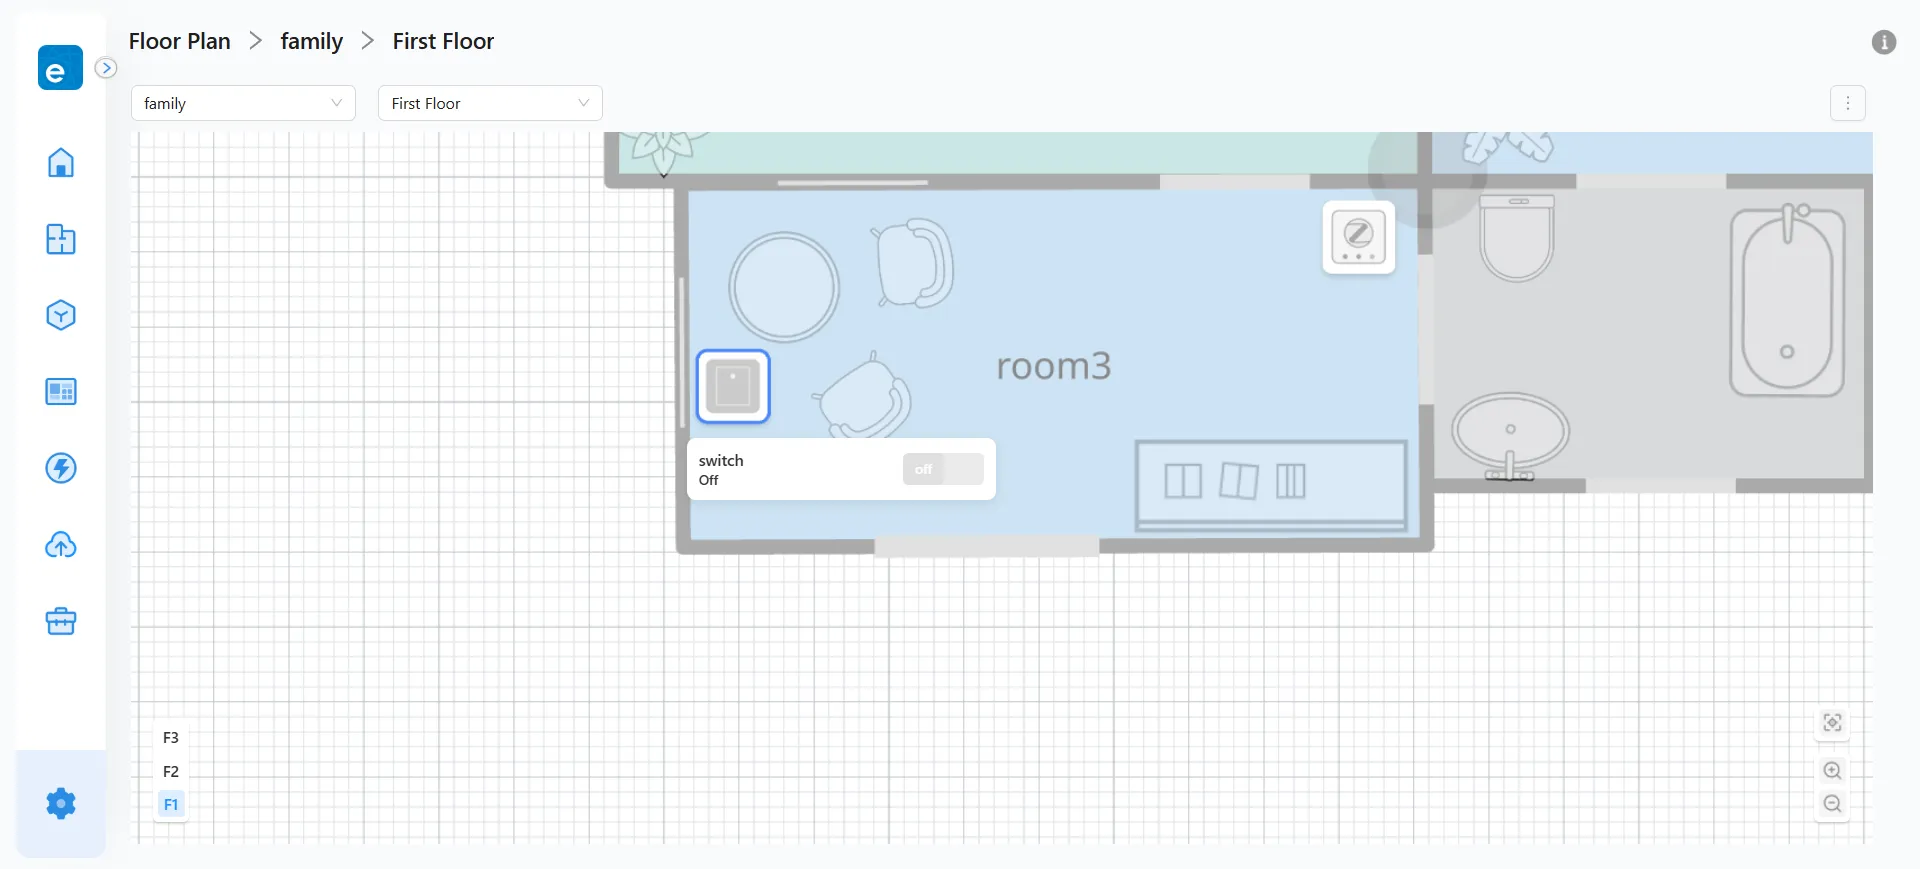
2. Device icons display their real-time status: On / Off / Offline.
3. Click a device icon to open the control window.
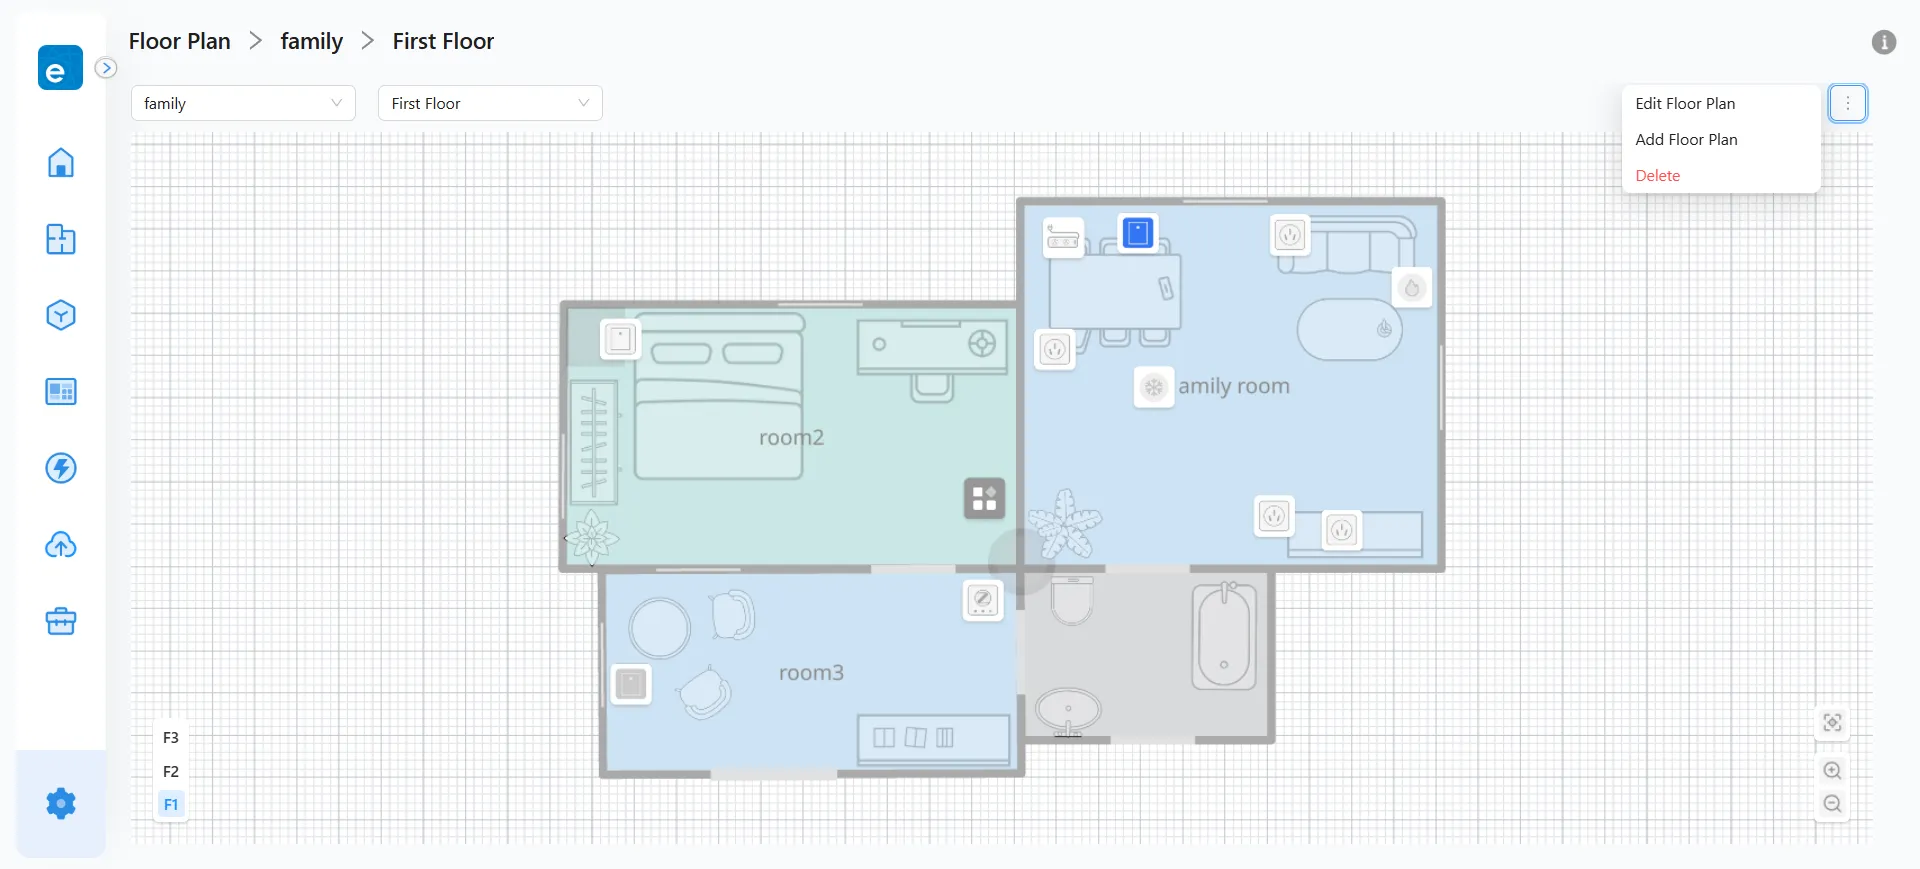
4. Switch between different floor plans and floors using the top-left menu. The bottom-left corner of the canvas also supports quick floor switching. To edit, delete, or add new plans for other homes, click “More” in the top-right corner.