zigbee2CUBE Backup Function
The zigbee2CUBE backup feature is designed to help you quickly migrate Zigbee devices added to zigbee2CUBE to Home Assistant running on iHost hardware.
- Preparations
1) Ensure Zigbee devices have been added to iHost.
2) Successfully run Home Assistant in iHost hardware by booting from TF card.(Download Home Assistant OS Image )
3) Ensure you can access the Home Assistant web interface. - Download backup
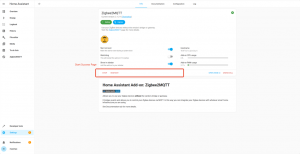
1) Download the "zigbee2CUBE" file.
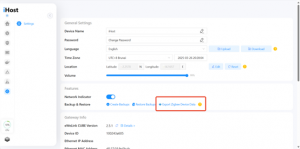
In the iHost settings page, in the " Backup & Restore " column, click to download "zigbee2CUBE"
( the default file format is "zigbee-{timestamp}.tar.gz", for example "zigbee-1740000000000.tar" )
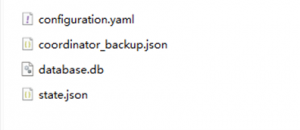
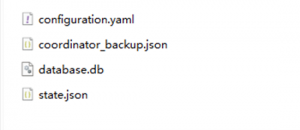
2) Extract the downloaded file. After extraction, you will obtain the following files:
configuration.yaml
coordinator_backup.json
database.db
state.json
- Restore via Zigbee2MQTT(Note: In addition to installing the Zigbee2MQTT Add-on, you must also install the "File editor" and "Mosquitto broker" Add-on )
1) Start HA OS.

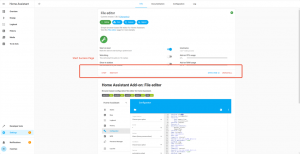
2) Install the "File editor" Add-on
a. Navigation.
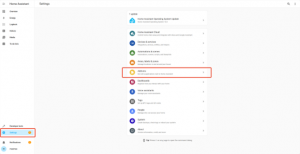
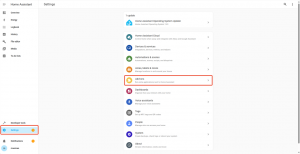
From the left sidebar, select "Settings".
Find "Add-ons" in the setting list on the right and click to enter.

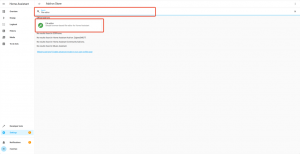
b. Search “File editor” Add-on.
Click the "ADD-ON STORE" button in the lower right corner of the page to access the "ADD-ON STORE" page.
In the search bar at the top, locate the "File Editor" Add-on by searching, then click on it to enter the "Info" page.
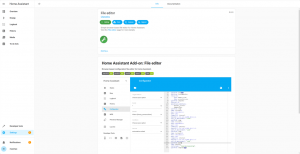
c. Install and run “ File editor ” Add-on.
Click "INSTALL", wait for completion, then click "START".
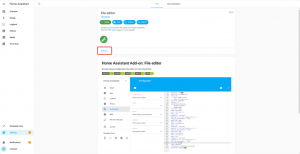
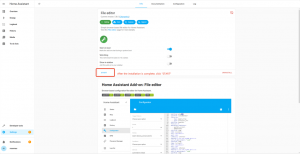
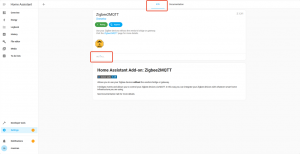
d. Enable sidebar access.
Open"Show in sidebar" to add "File editor" to the left sidebar.(Will be used later)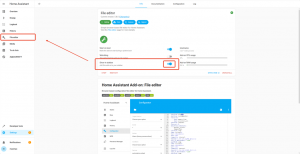
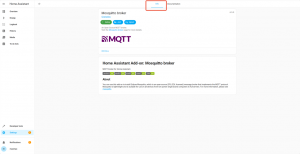
3) Install the “ Mosquitto broker ” Add-on.
a. Navigation.
From the left sidebar, select "Settings".
Find "Add-ons" in the setting list on the right and click to enter.
b. Search “Mosquitto broker” Add-on.
Click the "ADD-ON STORE" button in the lower right corner of the page to access the "ADD-ON STORE" page.
In the search bar at the top, locate the "Mosquitto broker" Add-on by searching, then click on it to enter the "Info" page.

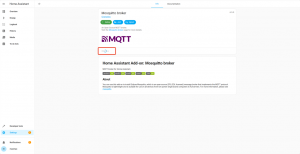
c. Install “ Mosquitto broker ” Add-on.
Click "INSTALL", wait for completion.
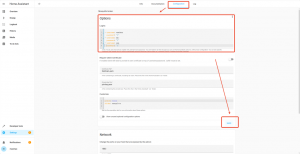
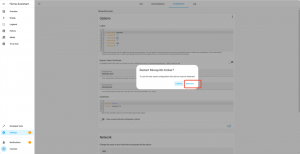
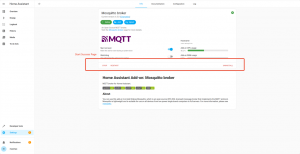
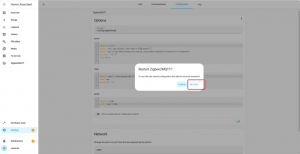
d. Configure the broker of the "Mosquitto broker" Add-on;
Open the "Configuration" page of the "Mosquitto broker" Add-on, enter the broker account and password in the "Options" column and click "SAVE".
Then a pop-up window will pop up asking you to "Restart Mosquitto broker", click OK and wait for the restart to succeed;
Example: (Information is for reference only, you need to use your own Broker account)
- username: amadeus
password: "1"
- username: mac
password: "1"
- username: app
password: "1"
e. Run the "Mosquitto broker" Add-on.
Click "START" and wait for the "Mosquitto broker" Add-on to start successfully.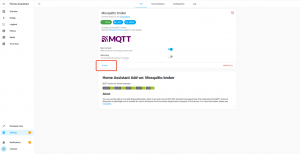
- 4) Install the “ Zigbee2MQTT ” Add-on.
a. Navigation.
From the left sidebar, select "Settings".
Find "Add-ons" in the setting list on the right and click to enter.
b. Search “Zigbee2MQTT” Add-on.
Click the "ADD-ON STORE" button in the lower right corner of the page to access the "ADD-ON STORE" page.
In the search bar at the top, locate the "Zigbee2MQTT" Add-on by searching, then click on it to enter the "Info" page.
c. Install “ Zigbee2MQTT ” Add-on.
Click "INSTALL", wait for completion. 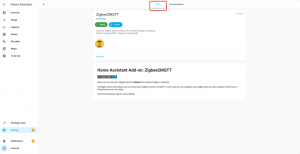
d. Modify "Configuration", including:
- "socat" configuration. (Keep the default parameters, no need to change) .
Configuration parameters (information for reference only):
enabled: false
master: pty,raw,echo=0,link=/tmp/ttyZ2M,mode=777
slave: tcp-listen:8485,keepalive,nodelay,reuseaddr,keepidle=1,keepintvl=1,keepcnt=5
options: "-d -d"
log: false
- "mqtt" configuration.
Configuration parameters (for reference only):
server: mqtt://core-mosquitto:1883
user: app
password: "1"
- "serial" configuration.
Configuration parameters (for reference only):
adapter: ezsp
port: /dev/ttyS4
After entering the configuration content, click "SAVE" and wait for it to succeed. 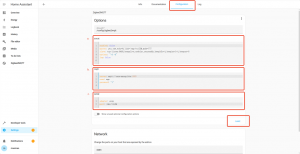
e. Enable sidebar access.
Open"Show in sidebar" to add "Zigbee2MQTT" to the left sidebar.(Will be used later)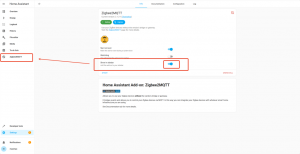
5) Replace the original data directory containing database.db, configuration.yaml, coordinator_backup.json, and state.json- a. Locate the entry for uploading "Zigbee2CUBE" backup files.
Select the “File Editor” section in the left navigation bar, then click the “Browse Filesystem” folder icon in the upper right corner. 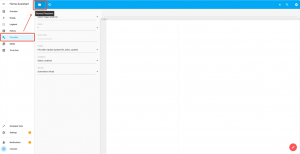
Select and open the "zigbee2MQTT" folder in the list.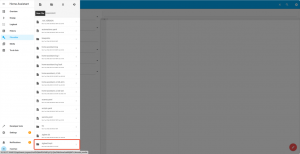
Click the "Upload File" icon in the top menu, and a pop-up window "Upload File" will appear on the right side of the interface.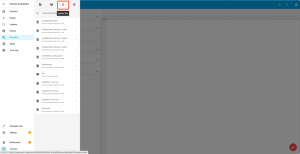
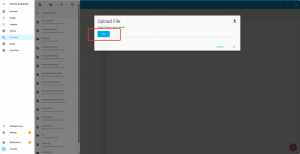
b. Upload the "Zigbee2CUBE" backup file.
Click the File button to open the system folder.
Select the "Zigbee2CUBE" backup file previously saved from iHost (ensure it is unzipped first).
You will obtain the following files:
“ configuration.yaml ”
“ coordinator_backup.json ”
“ database.db ”
“ state.json ”
Select these files, click OK, and upload them one by one.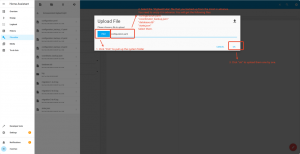
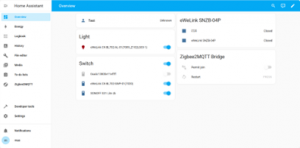
c. Start Zigbee2MQTT, wait for the device to come online and try to control the device successfully.
After uploading the above files, start "Zigbee2MQTT".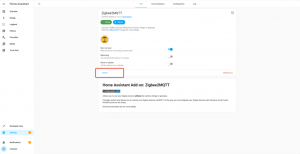
Wait for startup to succeed.
Click zigbee2MQTT in the left navigation bar to access the device list.
Check if the devices have been successfully migrated.
If the devices appear in the list, then you have successfully restored them.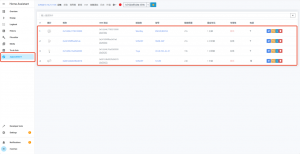
4. Restore via "Zigbee Home Automation"
1) Start HA OS.
2) Add "Zigbee Home Automation" integration.
a. Navigation.
From the left sidebar, select "Settings".
Find "Devices & services" in the setting list on the right and click to enter.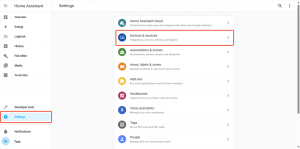
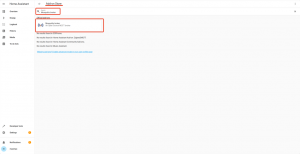
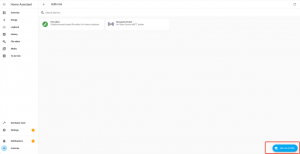
Click the "ADD-ON INTEGRATION" button in the lower right corner of the page to access the "ADD-ON INTEGRATION" page.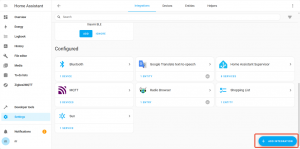
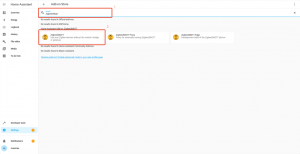
On the pop-up window titled “What do you want to add?”, search for “Zigbee Home Automation” integration in the search area;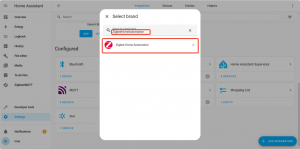
a. Add “Zigbee Home Automation” integration.
Select “Zigbee Home Automation” integration and enter the configuration page.
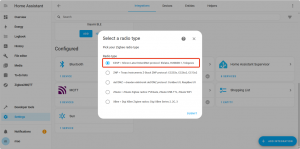
On the "Select a radio type" pop-up page, "Pick your Zigbee radio type".
Select "EZSP = Silicon Labs EmberZNet Protocol: Elelabs, HUSBZB-1, Telegesis", and then click "Submit".
In the "Serial device path" field, enter "/dev/ttyS4", keep the default Port speed to "115200", and click "SUBMIT"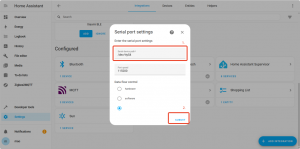
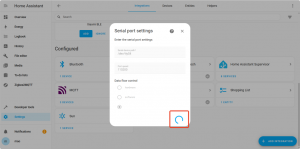
Wait for Zigbee Home Automation integration to succeed.-
3) Restore the "Zigbee2CUBE" file in the "Zigbee Home Automation" integration
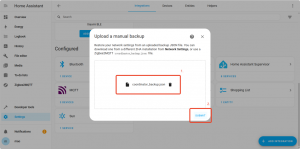
a. Select the "Zigbee2CUBE" backup file.
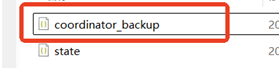
Click "Upload a manual backup", enter the system file, find the backup file downloaded from iHost (the default file format is "zigbee-{timestamp}", open the folder and select "coordinator_backup". 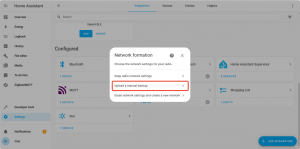


- Click "SUBMIT" to start Zigbee2CUBE file recovery. The first recovery may take more time, please be patient.