Schedule/Timer/Loop Timer
To automate daily routines, such as turning on/off smart devices at a fixed time, you will need the schedule, timer and loop timer features of eWeLink app.
Schedule
As per your own plan, create schedules that work just once or repeat at regular intervals.
1. Once only
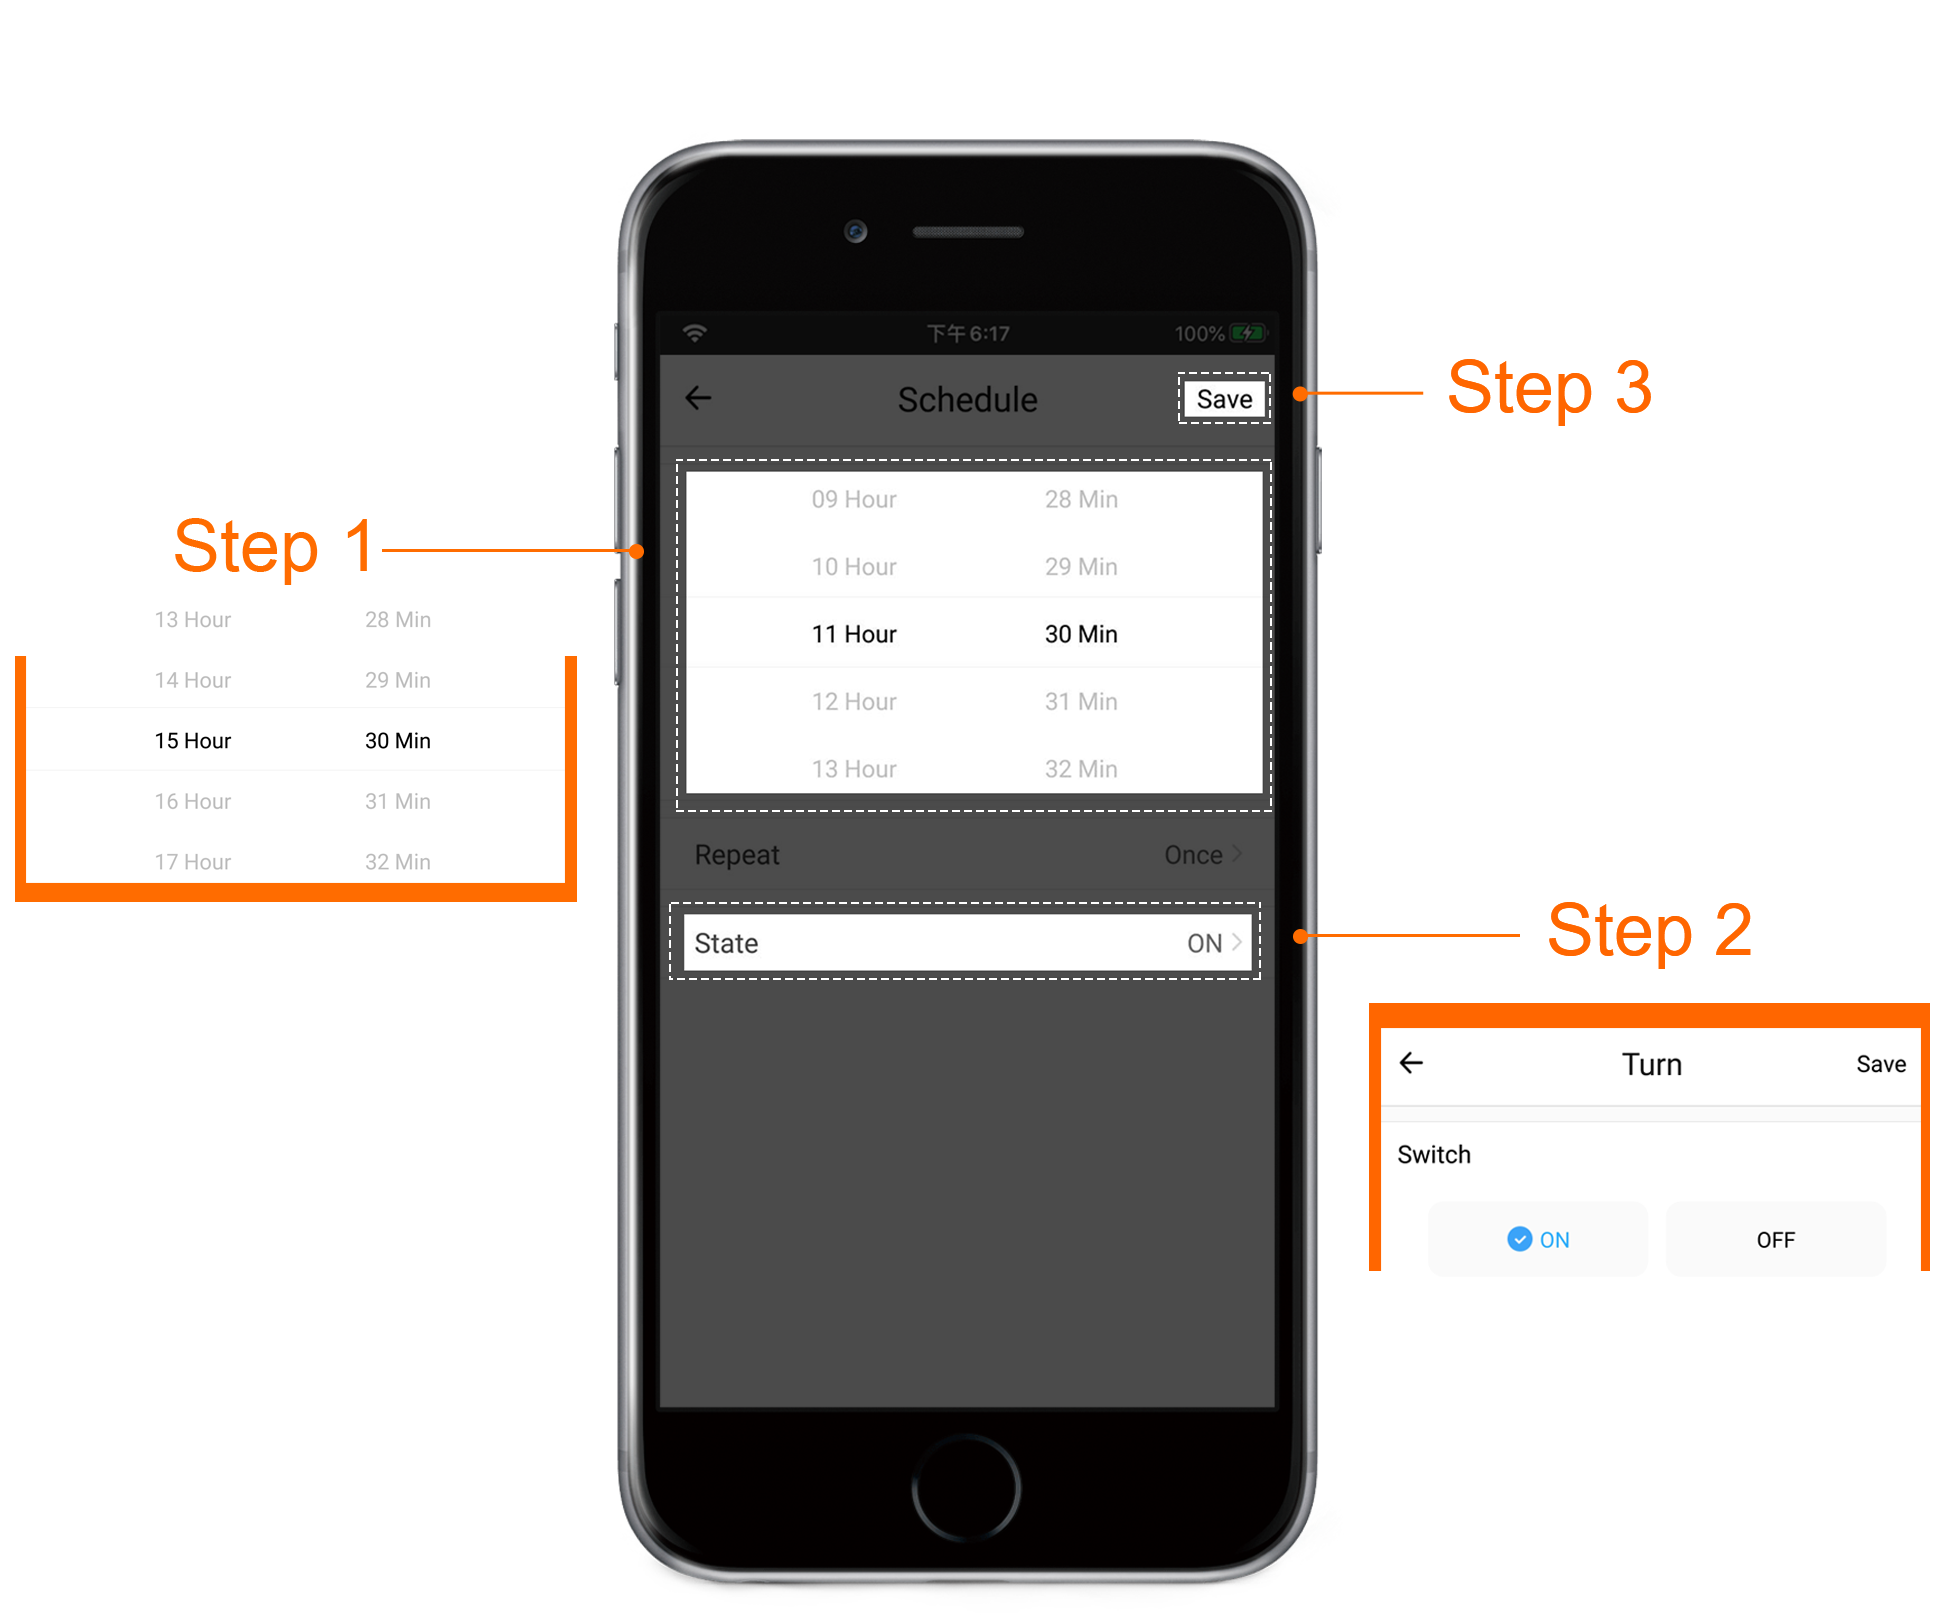
If you expect a smart device to take a certain action (such as turn on, turn off or change color) once at a preset time, create a schedule to make it happen. For example, you can create a schedule to turn on a device at 3:00 pm today.
Note:
If the time you set is earlier than the current time, for example, it is 3:00 pm now and you set a schedule to run at 8:00 morning, then the schedule will perform at 8:00 tomorrow.
2. Repeating
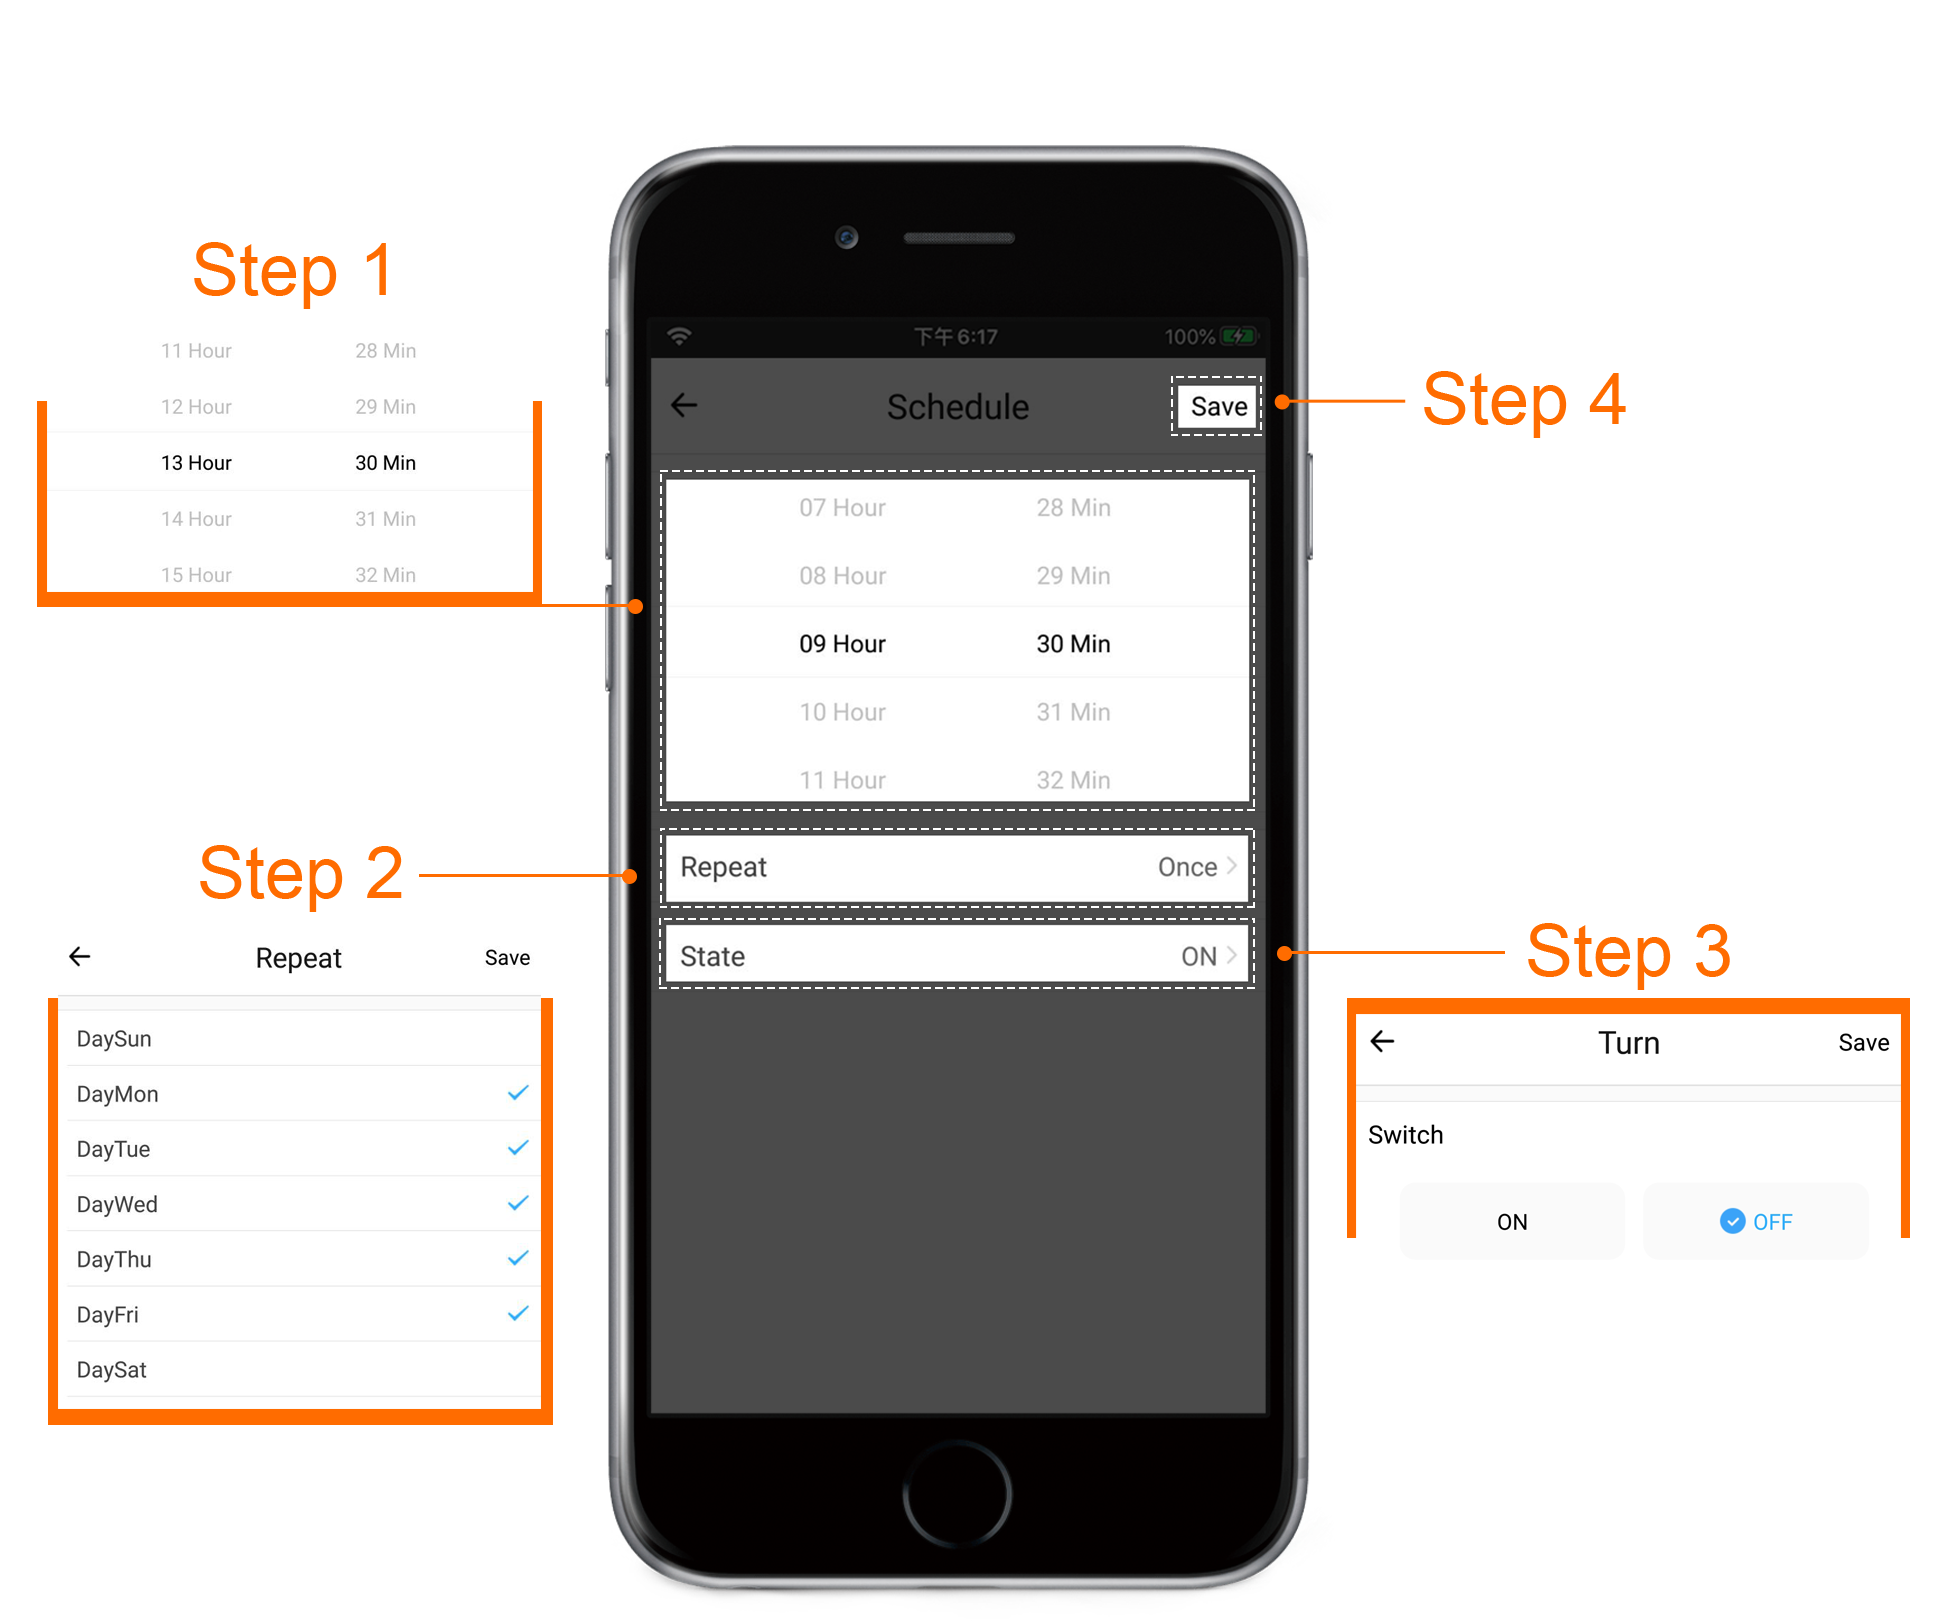
In case that you need a schedule to repeat at preset intervals, such as at 9:00 am every Monday, Tuesday and Wednesday, select corresponding repeating days for your schedule.
Note:
The only difference between just-once schedule and repeating schedule is that you could set the days of week to repeat the schedule.
Timer
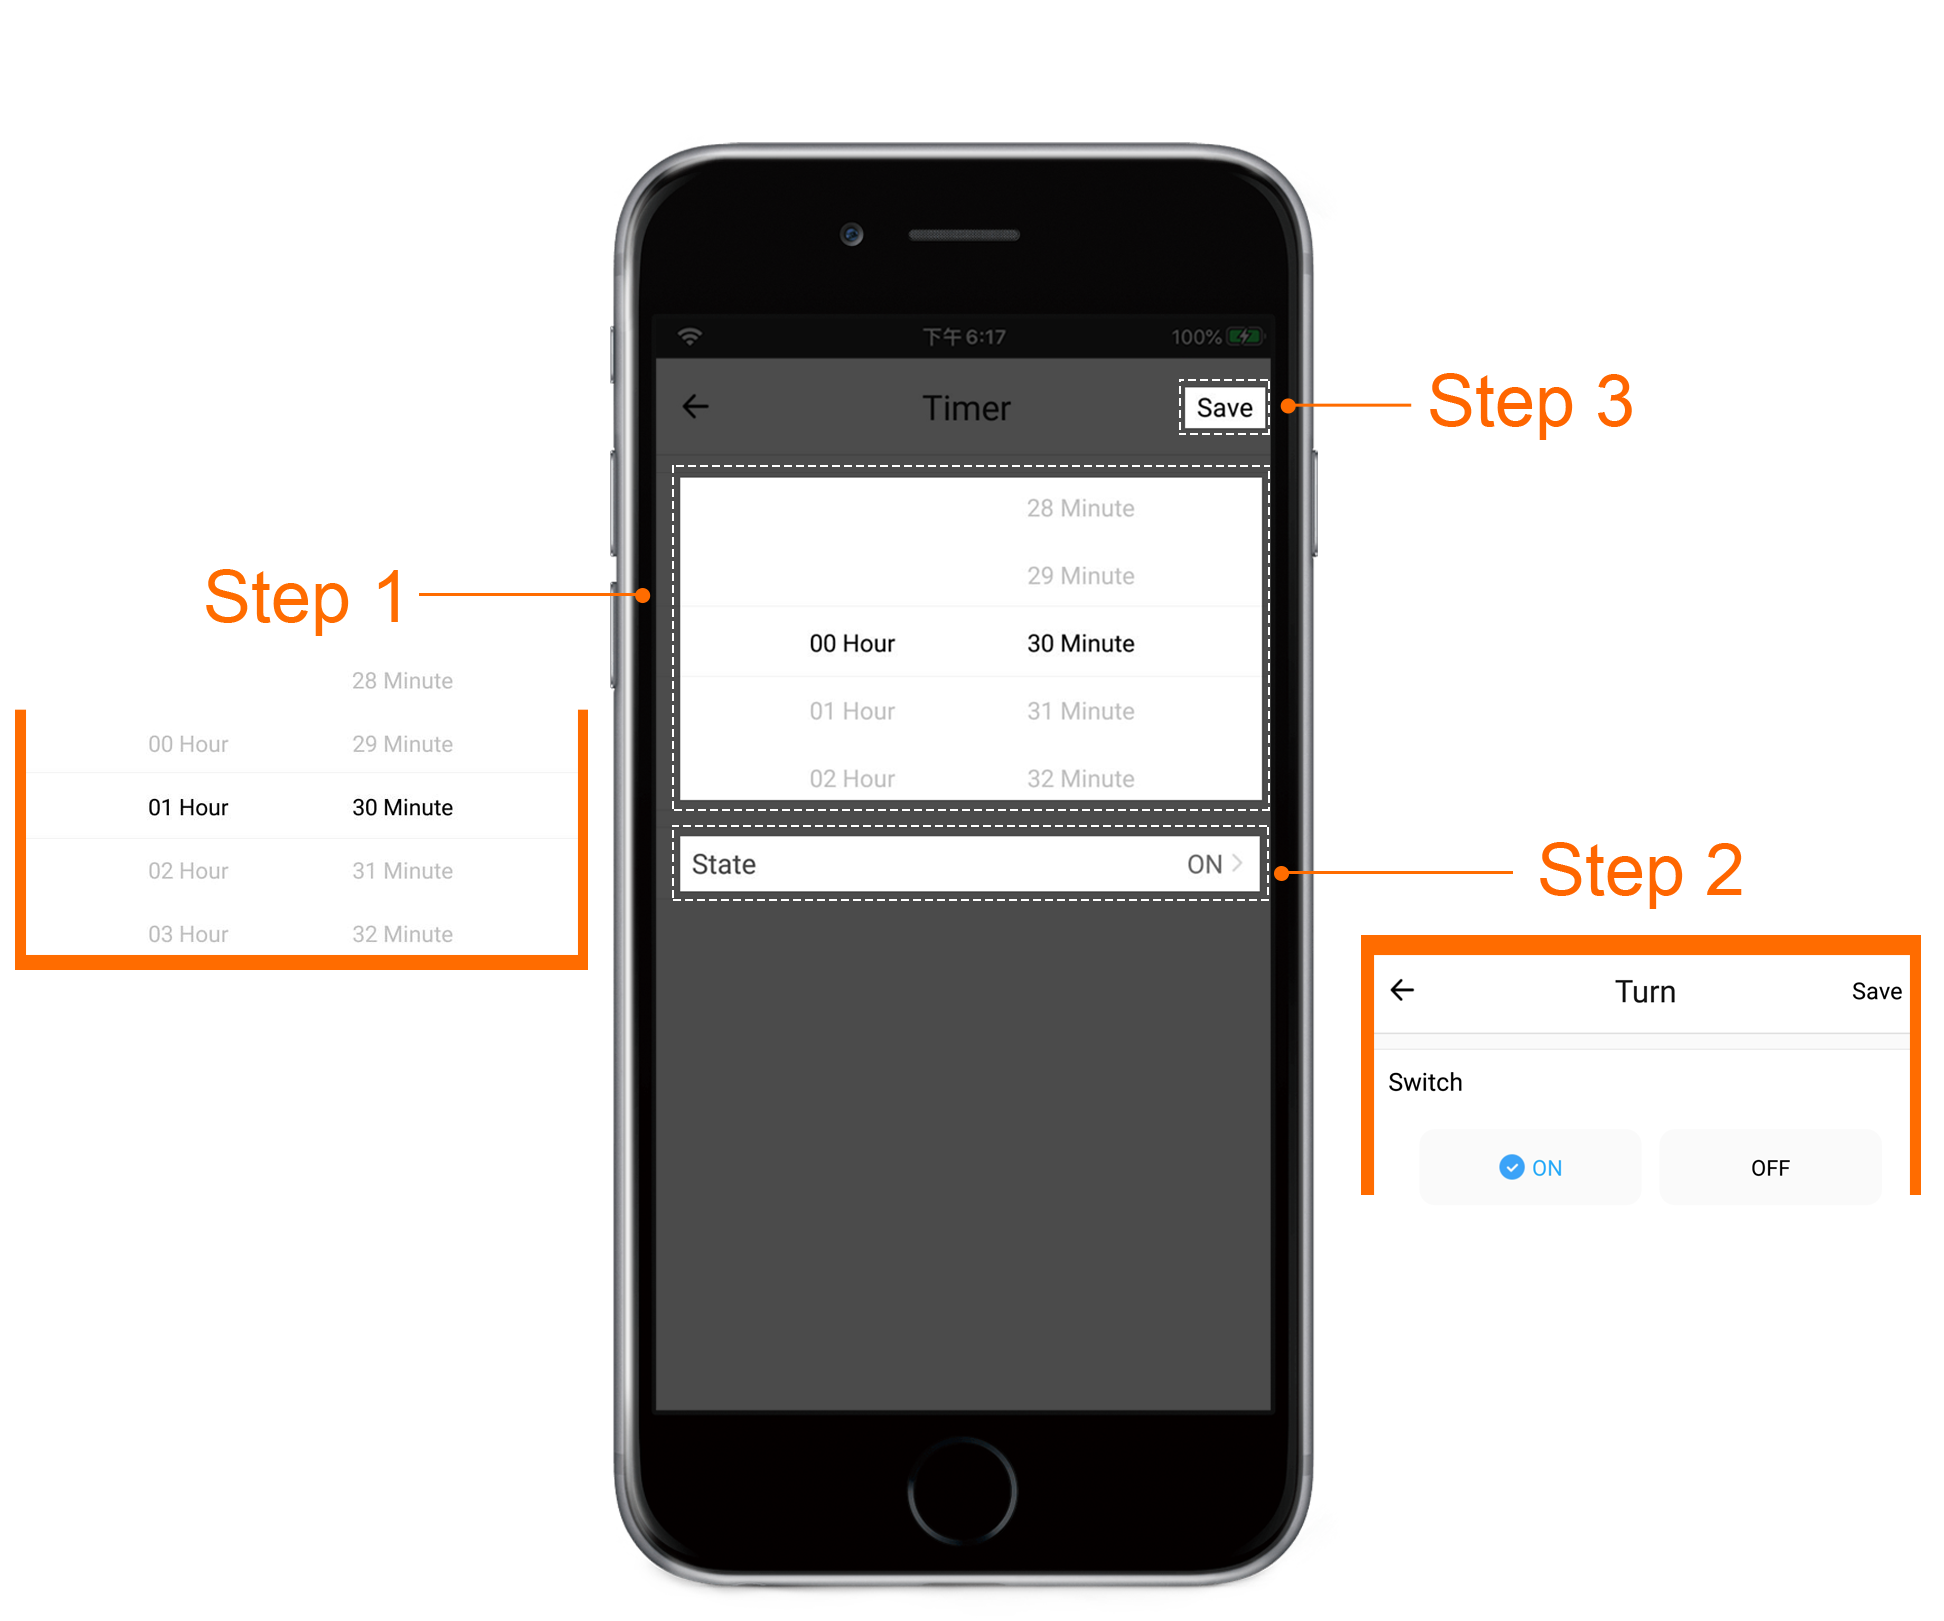
If you want your device to take a certain action (such as turn on, turn off or change color) after a certain period, such as a charging pile to turn off 4 hours later, then create a timer to count down for 4 hours.
Note:
A timer cannot be longer than 23 hours 59 minutes.
Loop Timer
Sometimes, we hope our device can work repeatedly in a shorter cycle (in minutes or hours), such as turning on every 30 minutes. In this case, a loop timer does what we desire.
1. Repeat
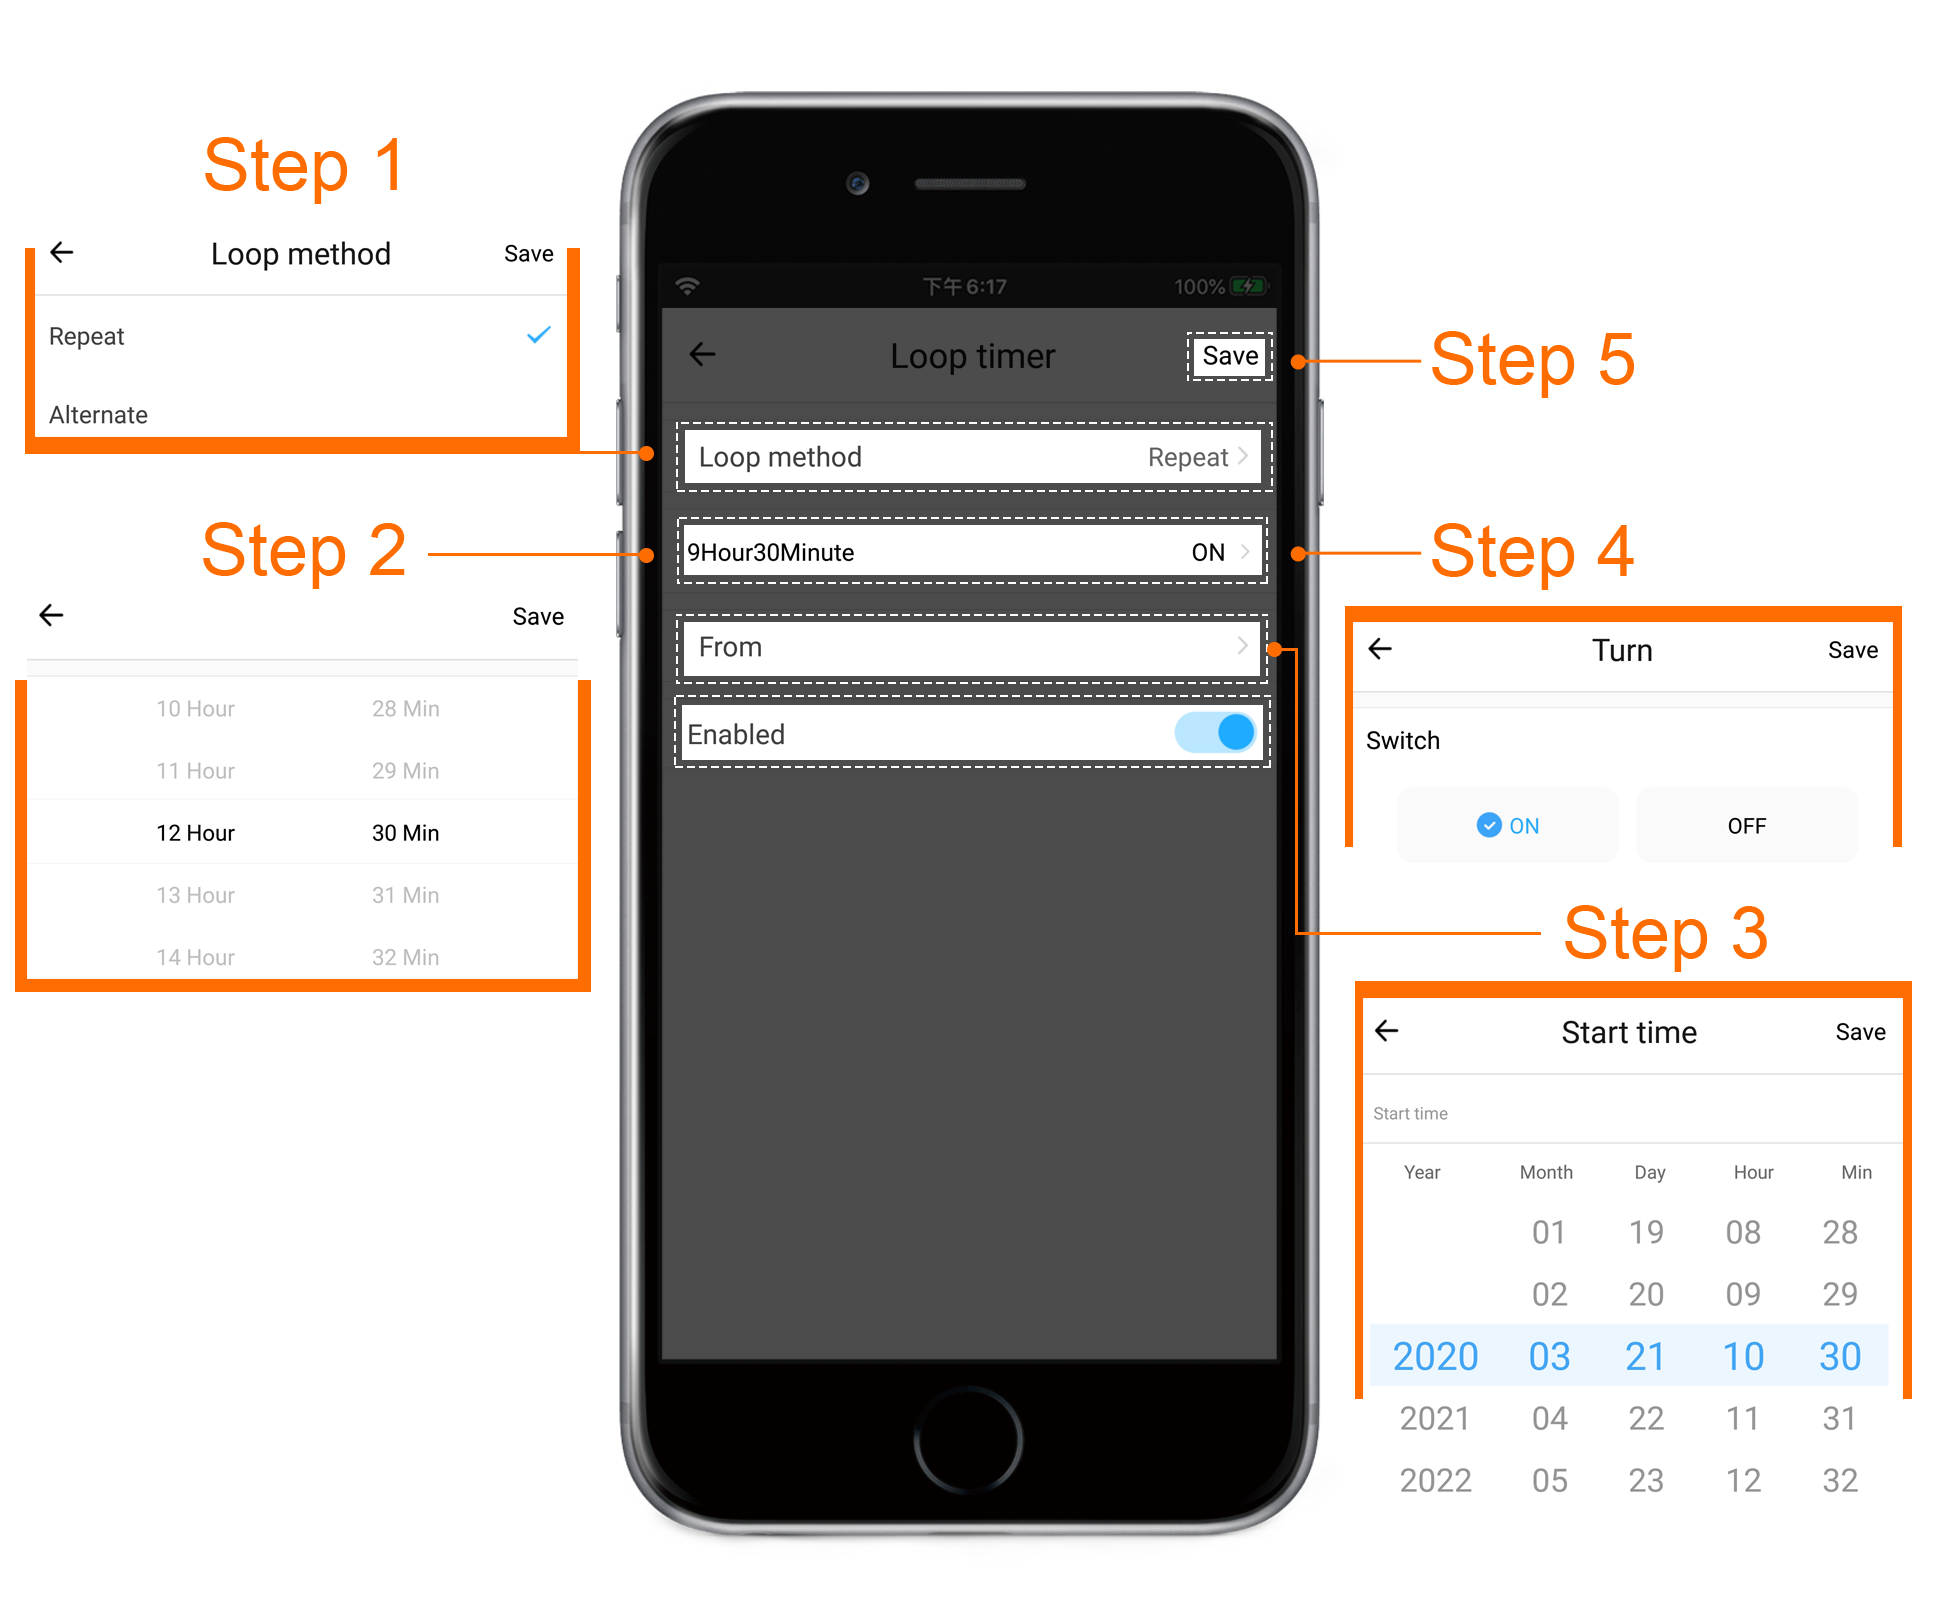
Whether to turn on or turn off, if there is only one repeating task for your device to do, such as turning on every 20 minutes, choose ‘Repeat’ as the loop method for your loop timer.
Note:
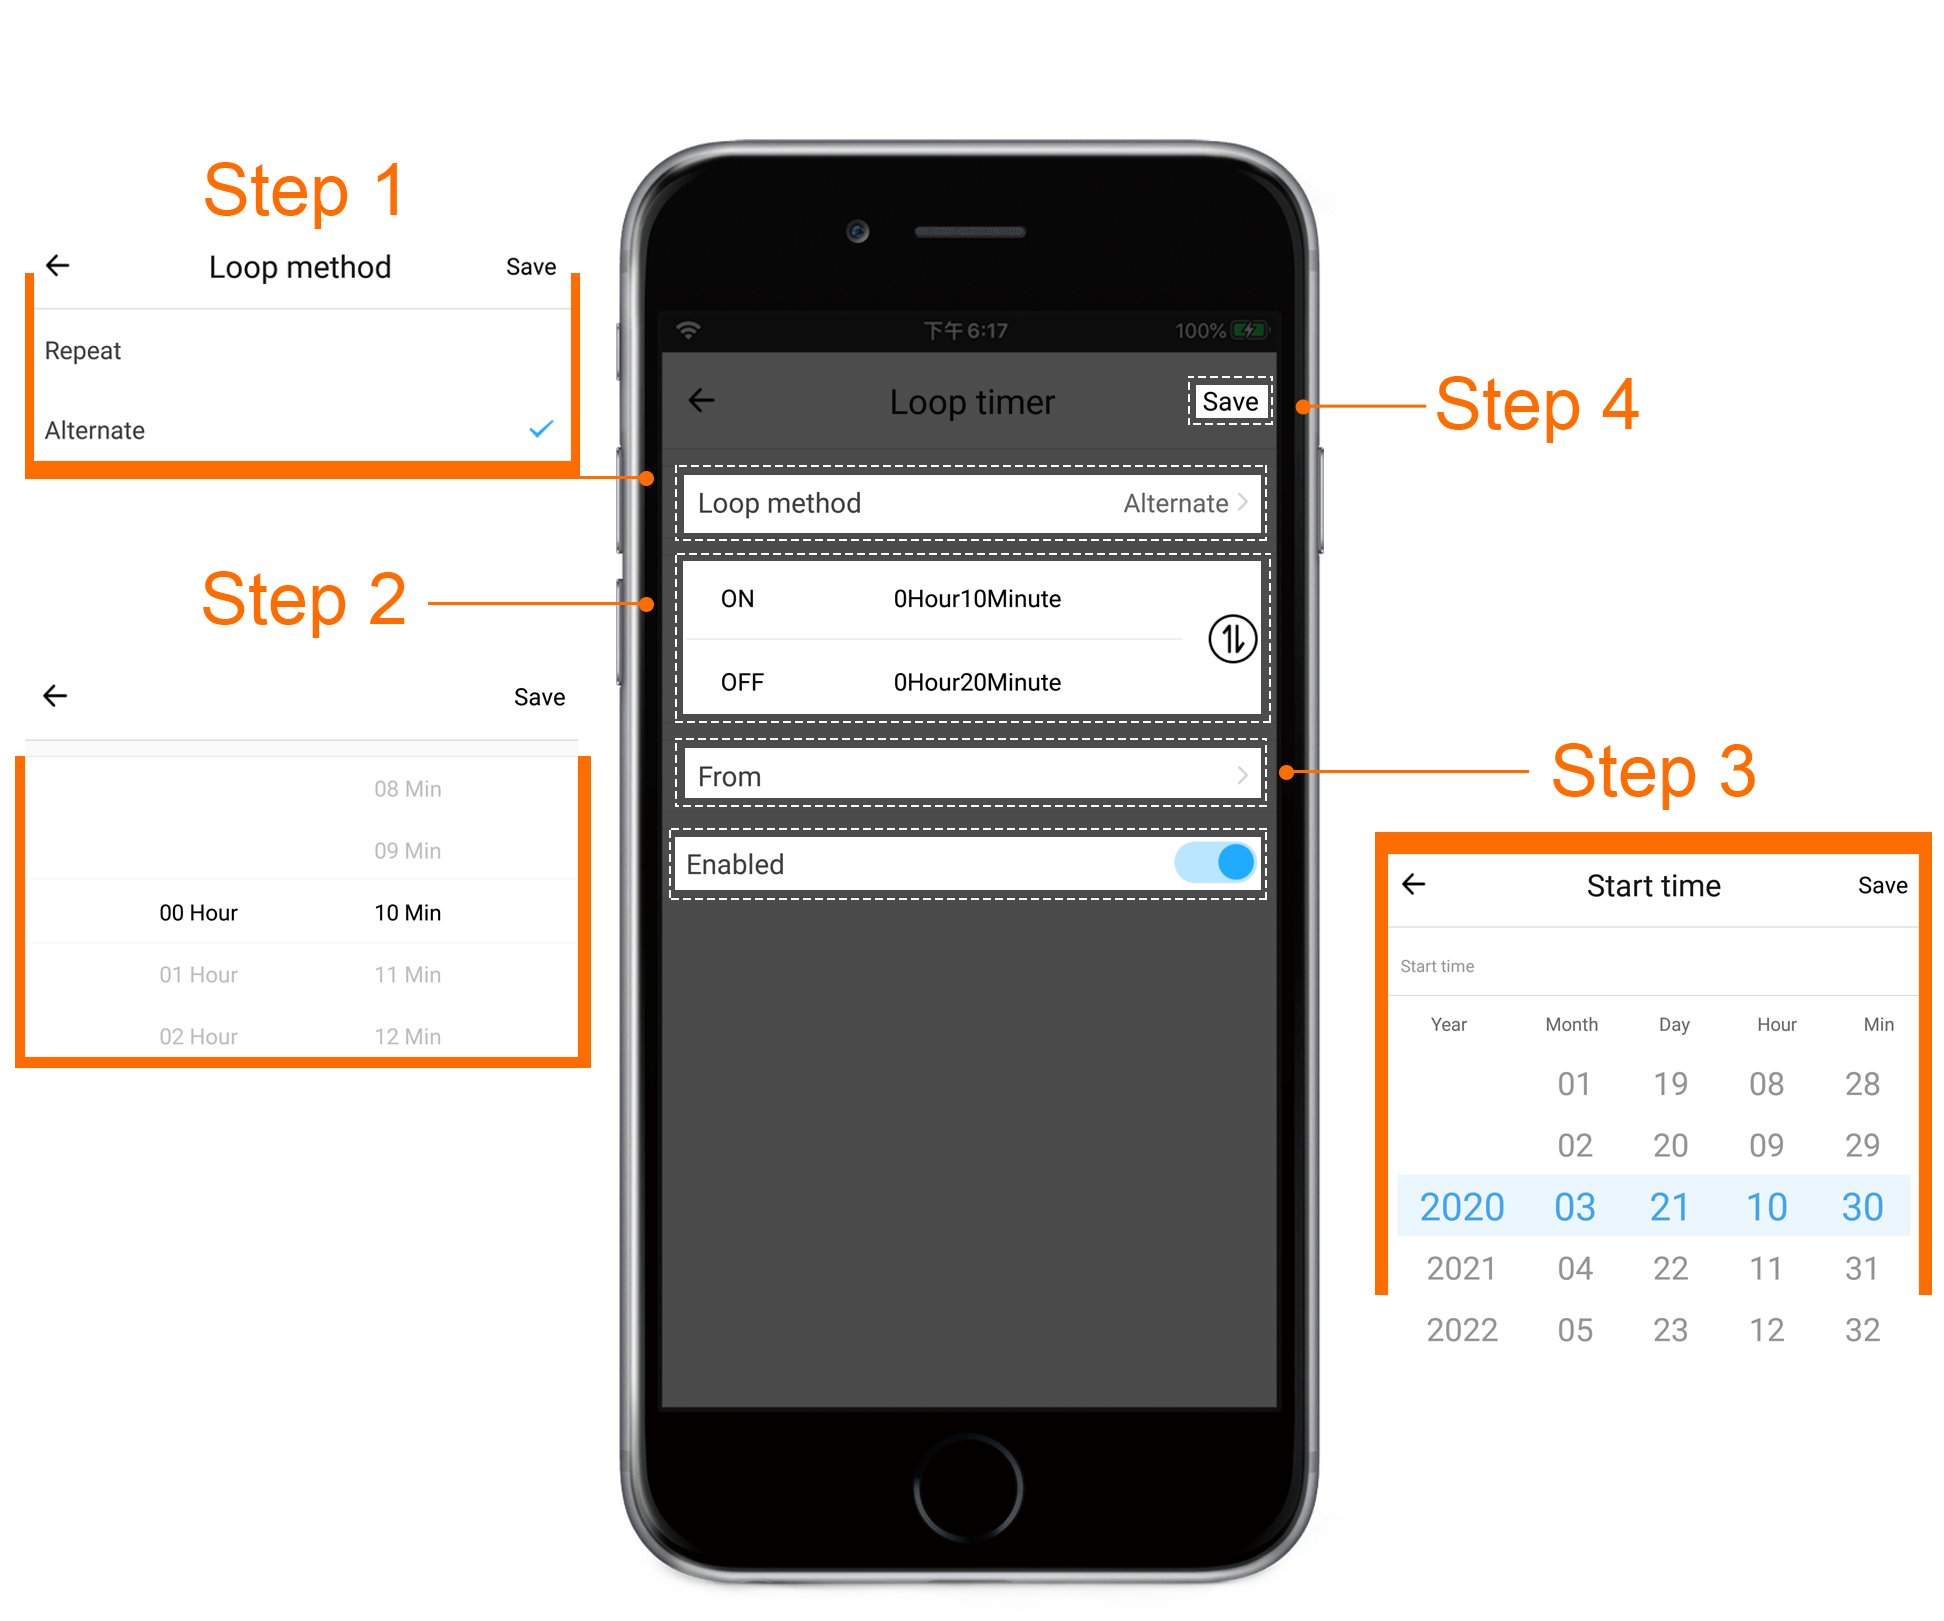
Regardless of the loop method, starting time is required for both types of loop timers. You should tap "from" to set a starting time for your loop timer. It is from this time that your device starts the loop.
2. Alternate
When there are two tasks for your device during a loop period, such as an aquarium air pump turning on every 10 minutes and turning off after 20 minutes, choose ‘Alternate’ as the loop method of your loop timer.
Tips:
● Even though eWeLink app supports schedule, timer and loop timer, the availability of these features may be subject to the type of devices and manufacturers. In this case, your user manual in the box of your device shall prevail.
● Each account cannot have more than 8 enabled timers, regardless of the types.
● To enable or disable a certain timer, tap on the schedule/timer/loop timer button, find the timer to enable or disable, tap on the toggle switch on the right.
● Generally, network connection on your smartphone is required to set a schedule/timer/loop timer. While the execution of a timer doesn’t need the internet. However, if the power supply is removed from the device, the list of schedules, timers and loop timers will be cleared. The list will not restore until the device has access to the internet again, since the device needs to connect to the server to get the list of timers.
Do you like this article? Would you like more people to read it in your native language?
Please email translation@coolkit.cn if you are willing to translate it to your language.